I was in the middle of a Saturday night movie marathon when my roommate dared me to create a snack that would out‑shine everything we’d ever tossed into a bowl. I was already half‑asleep, the popcorn was soggy, and the fridge was whispering for attention. I grabbed whatever I could find: a bag of pretzel sticks, a box of Chex, a handful of chocolate chips, and a lonely tub of caramel sauce. The result? A chaotic, glittering mess that tasted like a carnival exploded in my mouth. That moment of reckless improvisation turned into what I now call the ultimate “White Trash Sweet Snack Mix.”
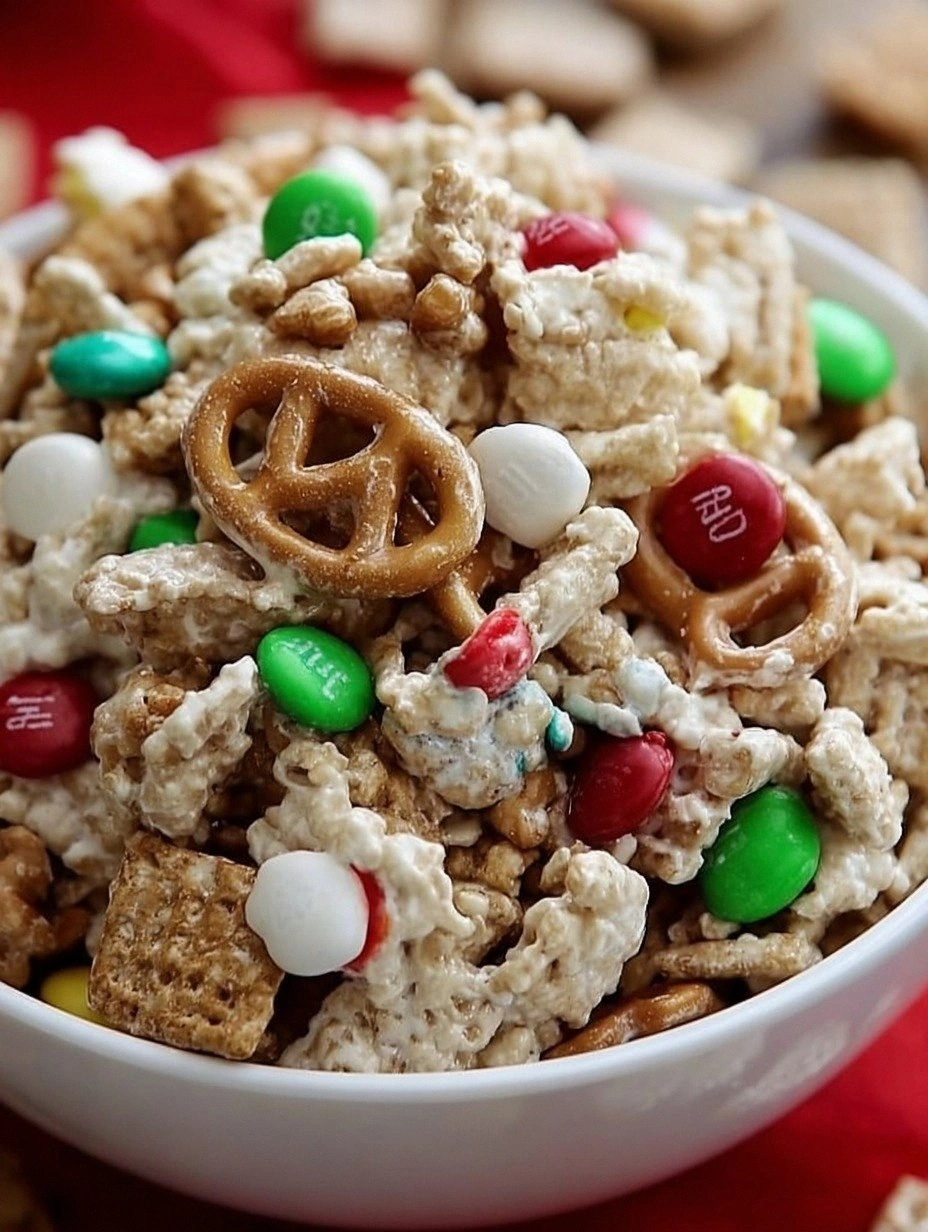
Picture this: the sweet aroma of melted butter and caramel swirling around the kitchen, the faint crackle of pretzel sticks as they hit the hot pan, and a glossy, caramel‑gold coating that clings to every morsel like a glossy varnish. The mix is a kaleidoscope of colors—deep chocolate, ruby‑red M&Ms, buttery gold pretzels, and fluffy marshmallows that melt just enough to create a chewy surprise. When you bite into it, you get a crunchy snap that gives way to a melt‑in‑your‑mouth softness, a texture dance that feels like fireworks on your tongue.
Most snack mixes out there either drown in syrup or leave you with a dry, flavorless crunch. Most recipes get this completely wrong. Here’s what actually works: a perfect butter‑brown‑sugar base that caramelizes just enough to coat without turning gummy, a dash of vanilla that adds depth, and a sprinkle of sea salt that balances the sweetness like a maestro conducting an orchestra. I’m not just talking about any snack; I’m talking about a treat that will have your guests begging for the recipe before the first bite even hits their palate.
And now, the secret weapon: a splash of caramel sauce that you wouldn’t expect in a “no‑bake” snack, but it adds a buttery richness that makes every bite feel like a decadent indulgence. I dare you to taste this and not go back for seconds. Let me walk you through every single step — by the end, you’ll wonder how you ever made it any other way.
What Makes This Version Stand Out
- Flavor Explosion: The buttery caramel coating locks in the chocolate, peanut, and pretzel flavors, creating a taste that’s simultaneously sweet, salty, and irresistibly nutty.
- Texture Symphony: You get the crunch of pretzels, the airy lightness of marshmallows, and the melt‑in‑your‑mouth feel of chocolate—all in one bite.
- Simplicity at Its Best: No oven, no fancy equipment—just a saucepan, a bowl, and a handful of pantry staples.
- Unique Twist: The addition of caramel sauce is the game‑changer that elevates this from “just another snack mix” to a festive show‑stopper.
- Crowd‑Pleaser: Kids love the colorful M&Ms, adults appreciate the sophisticated caramel‑butter glaze, and everyone leaves with a smile.
- Ingredient Quality: Using high‑quality dark chocolate and real butter makes the difference between “good” and “hand‑crafted gourmet.”
- Make‑Ahead Magic: Once set, the mix stays crunchy for days, making it perfect for parties, potlucks, or a quick midnight nibble.
- Versatile Base: The recipe can be tweaked for holidays, birthdays, or even a spooky Halloween treat with a few color swaps.
Inside the Ingredient List
The Flavor Base
Butter is the silent hero here. It carries the brown sugar into a caramel that coats every morsel, delivering that buttery richness you crave. Use unsalted, real‑fat butter; margarine will leave a greasy aftertaste. If you skip the butter, the mix turns into a dry, flavorless heap.
The Texture Crew
Pretzel sticks provide that satisfying snap, while Chex (or cornflakes) add a light, airy crunch. The mini marshmallows are the secret soft spots that melt slightly, creating a chewy pocket within each bite. Replace pretzels with salted crackers for a different crunch, but remember the salt level will shift.
The Unexpected Star
Caramel sauce is the surprise element that turns a simple snack into a festive treat. It brings a deep, buttery sweetness that pairs beautifully with dark chocolate. If you’re allergic to dairy, try a coconut‑based caramel, but the flavor profile will change noticeably.
The Final Flourish
M&Ms and chocolate chips are the colorful, melty finish. The chocolate adds depth, while the M&Ms contribute bursts of color and a crunchy candy shell. If you prefer a more adult palate, swap M&Ms for candied orange peel or espresso‑kissed chocolate chunks.
Everything's prepped? Good. Let's get into the real action...
The Method — Step by Step
Gather all dry ingredients—pretzel sticks, Chex, peanuts, marshmallows, chocolate chips, and M&Ms—into a massive mixing bowl. I like to line the bowl with parchment paper; it makes cleanup a breeze and prevents sticky clumps from hugging the sides. Give everything a quick toss so the colors blend, and set the bowl aside. Tip: If you’re using salted pretzels, you may want to reduce the extra pinch of salt later.
In a heavy‑bottomed saucepan, melt ½ cup (1 stick) of butter over medium‑low heat. As soon as it’s fully melted, stir in 1 cup of brown sugar and keep the mixture moving with a wooden spoon. You’ll hear a gentle fizz—this is the sugar dissolving and beginning to caramelize. When the mixture turns a deep amber and you catch a faint nutty aroma, you know you’re on the right track.
Kitchen Hack: Add the brown sugar gradually; this prevents clumping and ensures a smooth caramel that coats evenly.Once the caramel is glossy, whisk in ½ cup of caramel sauce and 1 tsp vanilla extract. The mixture will bubble up, releasing an intoxicating scent that will have you double‑checking the timer—don’t walk away from the stove here. Let it simmer for another 30 seconds, then remove from heat. This is the moment of truth; the sauce should be thick enough to coat the back of a spoon without running off.
Immediately pour the hot caramel over the dry mix in the bowl. Using a spatula, fold the mixture quickly but gently. You’ll see the caramel envelop every pretzel, every Chex flake, and every chocolate chip, turning the entire bowl into a shimmering, sticky sea of sweet goodness. If the caramel starts to harden before you’ve finished, give the pan a quick return to low heat and stir for a few seconds.
Now, here’s a pro tip that many overlook: sprinkle a pinch (about ½ tsp) of flaky sea salt over the top while the mixture is still warm. The salt crystals will dissolve slightly, creating pockets of salty caramel that explode on the tongue. Watch Out: Over‑salting can dominate the sweet notes, so stick to a light hand.
Watch Out: If the caramel overheats, it can turn bitter. Keep the heat low and watch the color closely.Transfer the coated mix onto a parchment‑lined baking sheet, spreading it out into an even layer about ½ inch thick. Press it down gently with the back of a spatula or your clean hands—this helps the pieces stick together when the mix sets. I like to use a second sheet of parchment on top to press without sticking.
Slide the sheet into the refrigerator for at least 30 minutes. This chilling step is crucial; it allows the caramel to set, giving the snack mix that satisfying snap when you bite into it. While you wait, you can clean up the kitchen or binge‑watch the next episode of your favorite show.
After the chill, break the mix into bite‑size clusters. The pieces should hold together but still crumble lightly when you bite. If any clusters feel too soft, give them another quick chill—this final touch ensures the perfect texture.
Store the clusters in an airtight container at room temperature for up to a week, or freeze for longer storage. The mix stays crunchy and flavorful, ready to be the star of any gathering. And now, the fun part—tasting! I’ll be honest — I ate half the batch before anyone else got to try it. That’s how good it is.
That's it — you did it. But hold on, I've got a few more tricks that'll take this to another level...
Insider Tricks for Flawless Results
The Temperature Rule Nobody Follows
Keep your saucepan on medium‑low heat throughout the caramelization. If the temperature spikes, the sugar can burn, leaving a bitter aftertaste that ruins the entire batch. I once tried a “high‑heat shortcut” and ended up with a blackened mess that tasted like burnt toast. Trust the low‑and‑slow method; the glossy coat will be worth the patience.
Why Your Nose Knows Best
Your sense of smell is the ultimate indicator of caramel readiness. When the butter‑brown‑sugar mixture starts to emit a warm, nutty aroma, you’re close to the perfect stage. If you rely solely on color, you might overshoot and get a hard, brittle glaze. So, keep that nose open and let the scent guide you.
The 5‑Minute Rest That Changes Everything
After pressing the mix onto the parchment, let it sit uncovered for five minutes before refrigerating. This brief rest allows the caramel to thicken just enough to cling without becoming too stiff. Skipping this step can lead to a crumbly, uneven texture that falls apart when you try to break it into clusters.
Salt Sprinkle Strategy
A light dusting of flaky sea salt after the caramel is poured adds a sophisticated contrast. The salt dissolves partially, creating pockets of salty caramel that pop in your mouth. Too much salt, however, can mask the sweet notes, so a pinch is all you need.
Mix‑In Timing
Add the chocolate chips and M&Ms after the caramel has cooled slightly (around 120°F). If you toss them in while the caramel is too hot, the chocolate will melt and lose its distinct snap, and the M&Ms can lose their color. A brief cool‑down preserves each ingredient’s texture and visual appeal.
Storage Savvy
Keep the mix in a glass container with a tight‑fitting lid. Glass doesn’t absorb odors, so your snack stays pure and fresh. If you notice any soft spots after a few days, pop the container in the oven at 200°F for five minutes to re‑crisp the pieces.
Creative Twists and Variations
This recipe is a playground. Here are some of my favorite ways to switch things up:
Holiday Cheer
Swap regular M&Ms for red and green candy-coated chocolate pieces, and add a handful of dried cranberries. The tartness of the cranberries balances the sweet caramel, making it perfect for Christmas gatherings.
Spicy Kick
Add a teaspoon of cayenne pepper to the caramel sauce for a subtle heat that tingles the palate. Pair it with dark chocolate chips for a sophisticated sweet‑spicy combo that’s great for adult parties.
Nut‑Free Delight
Replace peanuts with toasted pumpkin seeds or sunflower seeds. This keeps the crunch while making the mix safe for those with nut allergies, and it adds a pleasant earthy note.
Tropical Twist
Mix in dried pineapple chunks and coconut flakes. The tropical fruit adds chewiness, while the coconut brings a fragrant aroma that transports you to a beachside bar.
Coffee Lover’s Dream
Stir in a tablespoon of instant espresso powder into the caramel. The coffee flavor deepens the chocolate, creating a mocha‑like experience that’s perfect for brunch gatherings.
Storing and Bringing It Back to Life
Fridge Storage
Place the clusters in an airtight container and store them in the refrigerator for up to a week. The cool environment keeps the caramel firm and prevents the chocolate from blooming. Before serving, let the mix sit at room temperature for 10 minutes so it softens just enough to bite easily.
Freezer Friendly
If you’ve made a large batch, freeze the clusters in a single layer on a parchment sheet, then transfer to a zip‑top freezer bag. They’ll keep for up to three months. When you’re ready to enjoy them, let them thaw in the fridge overnight and give them a quick 5‑minute blast in a 300°F oven to restore crunch.
Best Reheating Method
To revive any lost crispness, spread the clusters on a baking sheet and warm them at 250°F for 5‑7 minutes. Adding a tiny splash (about a teaspoon) of water to the pan before reheating creates a gentle steam that re‑hydrates the caramel without making it soggy.