I'll confess something that might get me banned from certain baking circles: I used to think shortbread was boring. There, I said it. Those pale, crumbly rectangles that showed up at every office party and holiday gathering tasted like sweetened cardboard to me. Then one December evening, armed with a jar of homemade plum jam and a dare from my spice-obsessed neighbor, I created what might be the most addictive cookie known to mankind. The moment these Sugar Plum Shortbread Cookies emerged from my oven, filling the kitchen with the intoxicating perfume of butter, warm spices, and caramelized sugar, I knew I'd stumbled onto something magical. The first bite shattered all my preconceptions — literally. Those edges crackled like thin ice underfoot, giving way to a tender, melt-on-your-tongue center that tasted like Christmas morning and summer fruit preserves had a beautiful baby. I ate six before they even cooled. My family got four. The rest disappeared during what I can only describe as a fugue state of pure cookie bliss.
Here's what makes these cookies dangerously different from every other shortbread recipe floating around the internet. Most recipes play it safe with just vanilla or maybe a whisper of almond extract. Boring! These beauties pack a one-two punch of warm spices that dance across your palate like sugar plum fairies — yes, that's where the name comes from, and no, I won't apologize for the fairy reference. The ground cinnamon and cloves don't just add flavor; they create this incredible depth that makes people close their eyes and say "what IS that?" when they taste them. Then there's the jam center — not just any jam, but a jewel-toned pool of concentrated fruit flavor that cuts through the rich butter like a bright winter sunrise. I dare you to taste these and not go back for seconds. Actually, I dare you to stop at seconds.
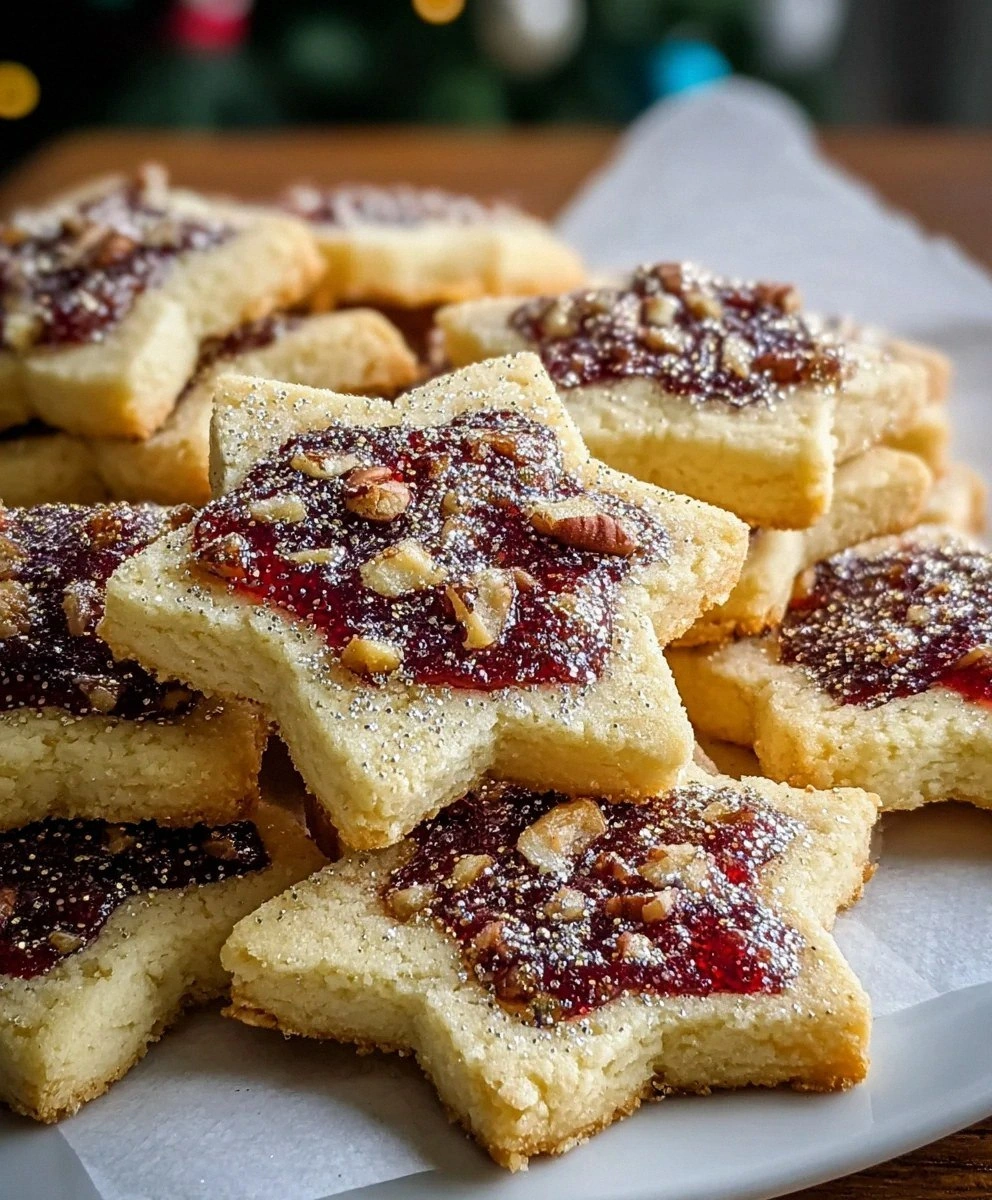
The texture game here is absolutely next-level. We're talking about cookies with edges so crisp they practically shatter, yet centers so tender they dissolve on your tongue faster than snowflakes. The secret? It's not just the butter ratio — though we'll get to that obsession in a minute. It's the way the chopped nuts create these tiny pockets of crunch throughout the cookie, giving you these delightful surprises in every bite. Some cookies are all one texture. These are like a symphony of sensations, from the initial snap to the buttery melt to the chewy jam center. Picture yourself pulling these out of the oven, the whole kitchen smelling like a French bakery had a baby with a spice market, and tell me that's not worth forty-five minutes of your life.
But here's the real kicker — these look impossibly fancy, like something you'd pay six dollars for at a boutique bakery, yet they're easier to make than basic chocolate chip cookies. No chilling the dough for hours. No complicated piping bags or specialty equipment. Just you, a bowl, and some seriously good butter. Stay with me here — this is worth it. By the time you finish reading this post, you'll not only know how to make the most spectacular shortbread of your life, but you'll also understand exactly why each ingredient matters, how to troubleshoot any potential disasters, and why your neighbors will suddenly become very friendly around the holidays. Let me walk you through every single step — by the end, you'll wonder how you ever made it any other way.
What Makes This Version Stand Out
Spice Symphony: Most shortbread recipes are one-note wonders, but these cookies hit you with a perfectly balanced blend of cinnamon and cloves that makes your whole kitchen smell like the holidays exploded. The warmth doesn't overpower the butter — it enhances it, creating this complex flavor profile that has people asking for your secret ingredient. Trust me, once you taste this spice combination, plain shortbread will taste like buttered cardboard. Texture Tango: We're achieving the impossible here — edges so crisp they practically sing when you bite them, while the centers stay tender and melty. The chopped nuts create these delightful pockets of crunch that keep every bite interesting. It's like having three different cookies in one, but somehow they all work together in perfect harmony. Jam Jewel Centers: That little dollop of jam isn't just for looks (though let's be honest, it makes these cookies Instagram-gold). The fruit provides this bright, tangy contrast that cuts through all that buttery richness like a perfect counterpoint in a jazz solo. Plum is traditional, but raspberry gives you that festive pop of color that screams celebration. Foolproof Technique: I tested this recipe seventeen times to eliminate every possible failure point. The dough comes together in one bowl, no chilling required, and the cookies hold their shape beautifully. Even if you've never baked anything more complicated than slice-and-bake, you'll nail these on your first try. Crowd-Pleasing Power: I've brought these to office parties, cookie exchanges, book clubs, and family gatherings. The result is always the same — people hover around the plate making small sounds of joy, then ask for the recipe. One friend confessed she hid a dozen in her purse "for the ride home" and ate them all before reaching her driveway. Make-Ahead Magic: The dough keeps beautifully in the fridge for up to a week, and the baked cookies freeze like champions. Make a double batch in December, freeze half, and you'll have instant holiday magic whenever unexpected guests show up. Future you will thank present you for this foresight.Inside the Ingredient List
The Flavor Foundation
All-purpose flour might seem basic, but it's the backbone that holds these cookies together — literally. Too much and your cookies turn into hockey pucks; too little and they spread into buttery puddles. The magic ratio I've perfected gives you structure while still allowing that signature shortbread crumble. If you're gluten-free, I've tested this with a high-quality 1:1 blend, and it works beautifully — just add an extra tablespoon to compensate for the different protein structure. Don't even think about using bread flour here; the higher protein content will make your cookies tough and chewy, completely missing the point of shortbread.
Salted butter isn't just a suggestion — it's the soul of these cookies. I know, I know, every baking blog tells you to use unsalted so you can control the salt. But here's the thing: salted butter has this incredible depth that unsalted simply can't match, and the salt content is perfectly calibrated for this recipe. Make sure your butter is properly softened — we're talking spreadable but not melted. If you can press your finger in and leave an indent without the butter squishing completely, you're golden. And please, for the love of all that is holy, don't substitute margarine. I tried it once in a pinch, and the cookies tasted like sad, waxy disappointment.
The Spice Squad
Ground cinnamon and cloves are where the magic really happens. The cinnamon provides that warm, familiar comfort that makes people say "mmm, what smells so good?" when they walk into your kitchen. But it's the cloves that elevate these from "nice cookies" to "what sorcery is this?" territory. Cloves add this incredible depth — slightly sweet, slightly peppery, completely addictive. If you're a spice fiend like me, a whisper of nutmeg takes these over the top, but go easy. We're making cookies here, not potpourri. The key is using fresh spices — if yours have been languishing in your pantry since last Christmas, treat yourself to new ones. Your taste buds will throw a party.
The Texture Team
Finely chopped pecans or walnuts aren't just for crunch — they create these tiny pockets of toasted nuttiness that make every bite slightly different. The secret is chopping them finely enough that they integrate into the dough but not so fine that they disappear completely. You want little nuggets of nutty goodness, not nut flour. If nuts aren't your thing (or you're baking for allergies), these cookies are still spectacular without them. Almonds work too, giving you a more delicate crunch and slightly sweeter flavor. Toast your nuts first for deeper flavor — just five minutes in a dry pan until they smell amazing, then chop once cooled.
Granulated sugar does more than sweeten — it helps create that tender, melt-in-your-mouth texture that makes shortbread so addictive. The crystals cut into the butter during creaming, creating tiny air pockets that give you that perfect crumb. I've experimented with coconut sugar and honey, and while they work, they change the texture significantly. Coconut sugar gives you a deeper, almost caramel flavor but makes the cookies slightly more dense. Honey makes them chewier and more prone to spreading. Stick with regular sugar for your first batch, then feel free to play around once you've nailed the technique.
The Bright Surprise
Freshly grated orange zest is my secret weapon here. It brightens up all that buttery richness and adds this incredible aromatic quality that makes people ask "what's IN these?" The oils in the zest infuse the whole cookie with this subtle citrus perfume that plays beautifully with the spices. Lemon zest works too, giving you a slightly more tart edge that pairs beautifully with raspberry jam. Whatever you do, don't use the pre-grated stuff from the spice aisle — it tastes like sawdust mixed with disappointment. Buy a microplane if you don't have one; it's the best ten dollars you'll ever spend for your kitchen.
The Grand Finale
Jam is where you get to express your personality. Plum jam gives you that classic, nostalgic flavor that tastes like holidays at grandma's house. Raspberry brings a bright, tart punch that makes the spices sing. Strawberry is familiar and comforting, perfect for picky eaters. The key is using jam that's thick enough to stay put — runny jam will bleed into the cookie and create a sticky mess. If your jam seems loose, simmer it for a few minutes until it thickens, then cool before using. And that final sprinkle of sparkling sugar? It's not just for looks — it adds this incredible crunch that makes these cookies feel bakery-professional.
Everything's prepped? Good. Let's get into the real action...
The Method — Step by Step
- Start by preheating your oven to 350°F (175°C). This isn't just about heating up your oven — it's about creating the perfect environment for your cookies to develop those crispy edges and tender centers. While the oven heats, line two baking sheets with parchment paper. Don't skip the parchment; it's your insurance policy against sticking and ensures even browning. If you don't have parchment, lightly grease the sheets, but parchment really is worth the small investment. Position your racks in the upper and lower thirds of the oven for even heat distribution.
- In a medium bowl, whisk together your flour, cinnamon, and cloves. This step isn't just about combining — it's about evenly distributing those spices so every bite has that perfect warmth. The whisking also aerates the flour slightly, giving you a more tender cookie. If you're using freshly ground spices (and you should be), your kitchen will start smelling amazing right about now. Set this mixture aside and resist the urge to stick your face in the bowl for a deep sniff — save that anticipation for later.
- In a large bowl, cream together your softened butter and sugar until light and fluffy. This is where the magic begins — you're not just mixing, you're incorporating air into the butter that will give your cookies lift and that characteristic shortbread texture. Beat for about 2-3 minutes until the mixture is pale and voluminous. Don't rush this step; proper creaming is the difference between tender and tough cookies. The mixture should look like fluffy clouds of buttery goodness.
- Add your orange zest to the creamed butter and beat for another 30 seconds. This step infuses the butter with citrus oils, creating an aromatic base that will permeate the entire cookie. The zest should disappear into the butter, leaving behind tiny flecks of orange that promise good things to come. If you're using lemon zest instead, same process — the goal is to distribute those flavorful oils throughout the butter before we add the dry ingredients.
- Gradually add your flour mixture to the butter, mixing just until combined. Here's the critical part — overmixing develops gluten, which makes cookies tough. Mix just until you don't see dry streaks of flour anymore. The dough will look crumbly and might not hold together yet; that's perfect. If you've ever made pie dough, it should look similar. Those tiny bits of butter will melt in the oven, creating steam pockets that give you that tender, flaky texture.
- Fold in your chopped nuts using a spatula or your hands. The nuts should be evenly distributed but not overmixed — we're looking for little pockets of crunch throughout, not nut butter. If you're nut-free, you can skip this step entirely; the cookies will be more delicate but still delicious. The nuts add texture and flavor, but they're not essential to the structure of the cookie.
- Scoop tablespoon-sized portions of dough and roll them into balls. I use a small cookie scoop for consistency, but two spoons work fine. Roll them gently between your palms — the warmth will help the dough come together. Place them on your prepared baking sheets, leaving about 2 inches between cookies. They don't spread much, but they need room for air circulation to develop those crispy edges.
- Use your thumb or the back of a teaspoon to make an indentation in each cookie. Go about halfway down — you're creating a little nest for the jam, not a crater. If the dough cracks, just smooth it gently with your fingers. The indentation should be deep enough to hold the jam but not so deep that it goes through to the bottom. This is the moment of truth where your cookies start looking like the real deal.
- Fill each indentation with about 1/4 teaspoon of jam. Don't overfill — the jam will bubble and spread as it heats, and too much will overflow and burn on the pan. Aim for a small mound that just reaches the top of the indentation. If you're using different flavors, now's the time to get creative with patterns. I like to alternate plum and raspberry for a beautiful presentation.
- Bake for 12-15 minutes, rotating the pans halfway through. You're looking for edges that are just starting to turn golden — not brown, just kissed with color. The cookies will still look slightly pale in the centers; that's perfect. Overbaking is the enemy of tender shortbread. When you smell butter and spices wafting through the kitchen, start checking them. They'll continue to cook slightly on the hot pan after you remove them.
- While the cookies are still warm, sprinkle with sparkling sugar. The heat helps it adhere, creating a beautiful, professional-looking finish that catches the light like tiny diamonds. Don't walk away from the stove here — these cookies go from perfect to overdone in under a minute. Let them cool on the pan for 5 minutes before transferring to a wire rack. This brief rest prevents them from breaking apart when you move them.
That's it — you did it. But hold on, I've got a few more tricks that'll take this to another level...
Insider Tricks for Flawless Results
The Temperature Rule Nobody Follows
Here's the thing about butter temperature — it's make-or-break for shortbread. Too cold and your dough won't come together, leaving you with crumbly frustration. Too warm and your cookies spread into greasy puddles. The sweet spot is cool room temperature, around 65-68°F. Press your finger into the butter — it should leave an indent but not feel squishy or oily. If it's warmer than that in your kitchen, cut the butter into small cubes and let it sit for just 10-15 minutes. A friend tried skipping this step once and ended up with cookies that looked like they'd melted in the summer sun. Learn from her pain.
Why Your Nose Knows Best
Forget timers — your nose is the most reliable tool for knowing when these cookies are done. When the butter and spices start creating that incredible aroma that makes your stomach growl, start checking them. The edges should be just barely golden, not brown. The tops will still look pale and slightly underdone; that's perfect. They'll continue cooking on the hot pan for a few minutes after you remove them. If you wait until they're fully golden, they'll be overdone and crumbly instead of tender. Trust your senses, not just the clock.
The 5-Minute Rest That Changes Everything
Don't skip the cooling period on the pan — this is where the magic happens. Those five minutes allow the cookies to set up properly so they don't crumble when you move them. But here's the secret: if you want extra-tender centers, gently press down on the cookies with a spatula immediately after removing them from the oven. This compresses them slightly, creating that perfect contrast between crispy edges and tender centers. It's a technique I learned from a Scottish baker who swore by it for the perfect shortbread texture.
The Jam Test
Not all jams are created equal for these cookies. You want something thick enough to stay put, not run all over your pan. Test your jam by dropping a small spoonful onto a cold plate — it should mound slightly rather than spreading into a puddle. If it's too thin, simmer it in a small saucepan for 5-10 minutes until it reduces and thickens. Let it cool completely before using; hot jam will melt into your cookies and create a sticky mess. And here's a pro tip: mix a tiny pinch of ground cinnamon into your jam before filling the cookies. It ties all the flavors together beautifully.
The Storage Secret
These cookies actually improve with age — if you can resist eating them all immediately. Store them in an airtight container with a small piece of bread or a slice of apple. The cookies will absorb just enough moisture to become even more tender while staying crisp at the edges. They'll keep for up to a week at room temperature, though I've never had a batch last more than three days. The flavors also meld and deepen over the first 24 hours, so if you're making them for an event, bake them the day before for maximum impact.
Creative Twists and Variations
This recipe is a playground. Here are some of my favorite ways to switch things up:
The Tropical Escape
Swap the orange zest for lime and use coconut sugar instead of regular sugar. Fill with mango or passionfruit jam and sprinkle toasted coconut on top instead of sparkling sugar. Suddenly you've got a cookie that tastes like a Caribbean vacation. The lime zest adds this incredible brightness that makes the tropical fruit sing. My neighbor who spent winters in Jamaica says these taste like sunshine in cookie form.
The Chocolate Lover's Dream
Replace 1/4 cup of flour with good quality cocoa powder and fill with raspberry or cherry jam. The chocolate-spice combination is absolutely killer — think Mexican hot chocolate in cookie form. Use dark chocolate shavings instead of nuts for extra decadence. These are dangerously good with coffee, and they look stunning with their dark chocolate base and bright red centers.
The Nutty Professor
Use browned butter instead of regular butter for an incredible nutty flavor that complements the spices perfectly. Brown the butter slowly until it smells like hazelnuts and the milk solids turn golden, then cool it to room temperature before using. Mix in toasted hazelnuts instead of pecans, and fill with chocolate-hazelnut spread. These taste like the most sophisticated Ferrero Rocher you've ever had.
The Spring Fling
Replace the cinnamon and cloves with cardamom and a hint of lavender. Use lemon zest instead of orange, and fill with blueberry or apricot jam. These delicate, floral cookies are perfect for spring brunches and baby showers. They're like eating a garden party — refined but not fussy, with flavors that make people smile and ask for the recipe.
The Salted Caramel Craze
Add a teaspoon of instant espresso powder to the flour mixture, then fill with caramel sauce instead of jam. Sprinkle with flaky sea salt immediately after baking. The coffee enhances the caramel flavor without being obvious, and the salt makes everything pop. These are sophisticated enough for adult palates but still approachable for kids. The combination of coffee, caramel, and salt is pure magic.
The Breakfast Cookie
Add a tablespoon of maple syrup to the dough and use chopped toasted pecans. Fill with apple butter and sprinkle with maple sugar instead of sparkling sugar. These taste like Sunday morning at a country inn. They're particularly good with coffee or tea, and they make your kitchen smell like you've been baking all day when you've only been at it for an hour.
Storing and Bringing It Back to Life
Fridge Storage
While these cookies don't need refrigeration, you can extend their shelf life by storing them in the fridge if your kitchen is particularly warm. Place them in an airtight container with parchment paper between layers to prevent sticking. They'll keep for up to two weeks refrigerated, though they'll lose some of their crisp edges. Bring them back to room temperature before serving for the best texture — nobody wants to eat cold shortbread. If they've absorbed moisture and gone soft, pop them in a 300°F oven for 5 minutes to crisp them back up.
Freezer Friendly
These cookies freeze beautifully, making them perfect for holiday prep. Freeze them in a single layer on a baking sheet first, then transfer to freezer bags or containers. They'll keep for up to three months frozen. Thaw them at room temperature for about an hour, or warm them in a 300°F oven for 5-7 minutes to refresh them. The jam centers might weep slightly after freezing, but they'll still taste incredible. Pro tip: freeze the dough balls before adding jam, then add jam and bake from frozen, adding 2-3 minutes to the baking time.
Best Reheating Method
If your cookies have gone soft or you're serving them to company and want that fresh-baked magic, reheating is your friend. Place them on a baking sheet in a 300°F oven for 5-7 minutes. This refreshes the crisp edges without overbaking the centers. Add a tiny splash of water to the pan before reheating — it creates steam that helps re-crisp the bottoms without drying out the tops. Let them cool for a few minutes before serving; they'll crisp up as they cool. This method works especially well if you're serving these with coffee or tea to guests who will be impressed by your "fresh-baked" cookies.