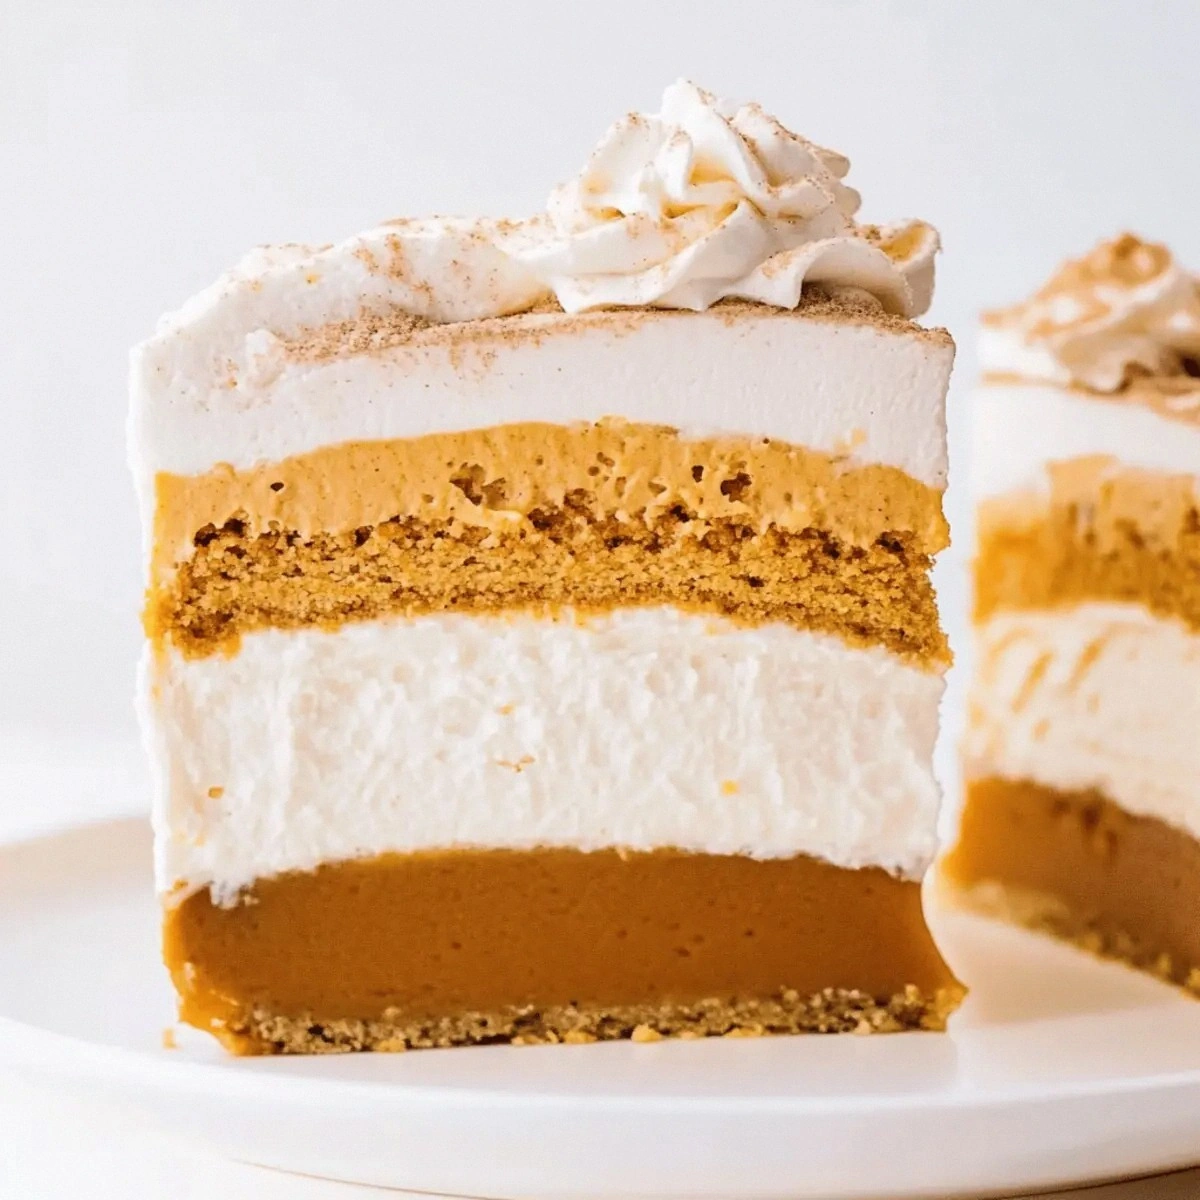
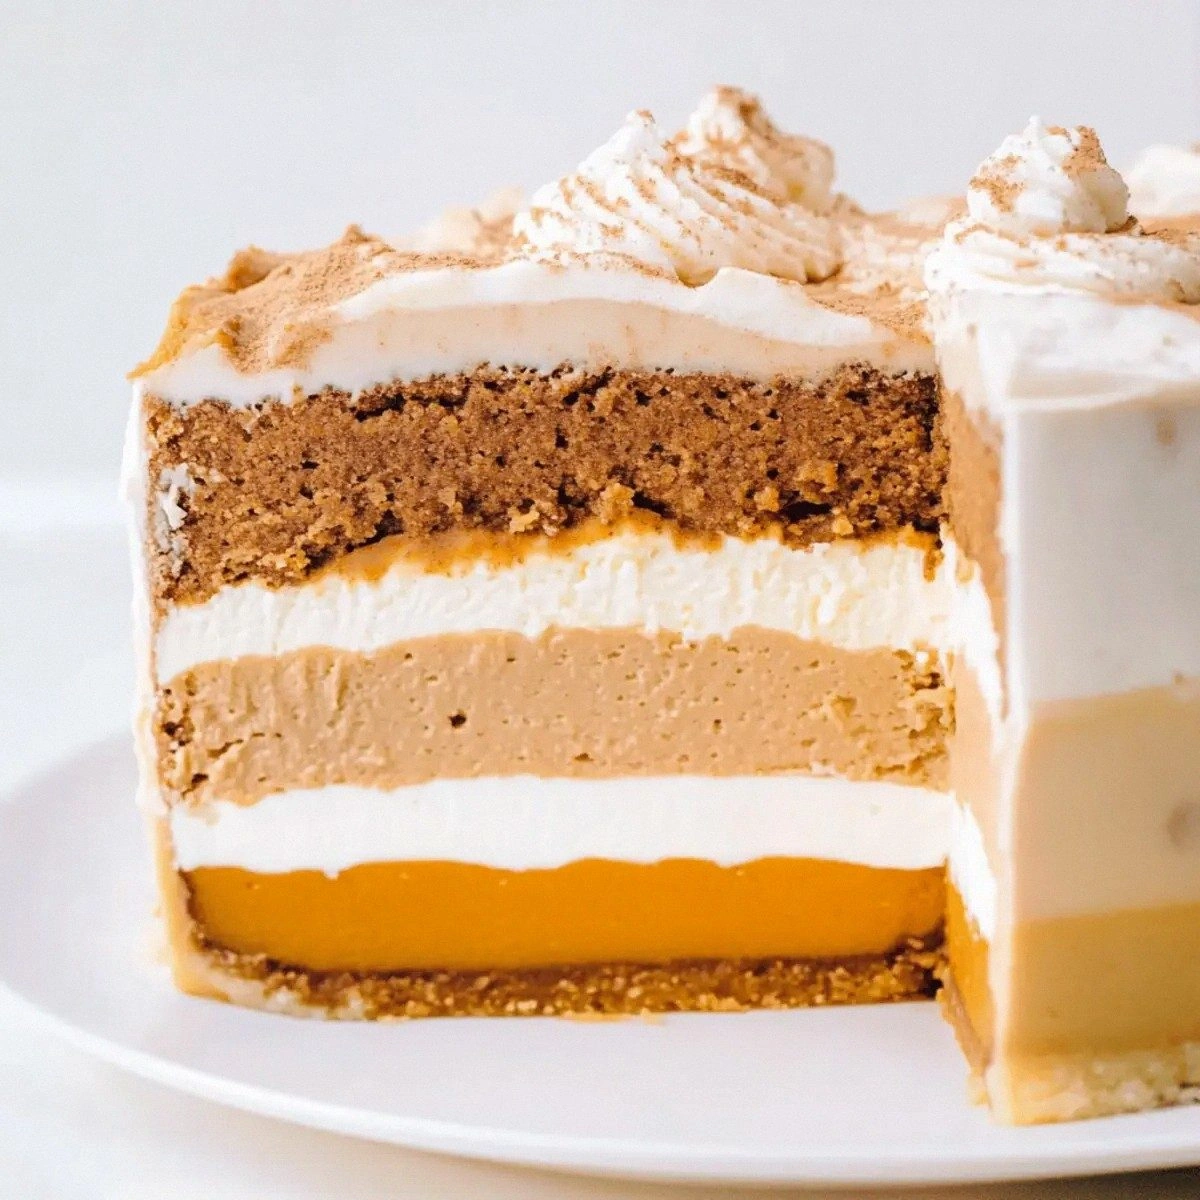
This isn't just another dessert recipe – this is the dessert that will have your relatives fighting over the last slice while simultaneously asking for your secret. Picture this: a perfectly spiced pumpkin pie, its custard as smooth as silk, nestled like a treasure inside a tender spice cake that's so moist it practically melts on your tongue. The whole masterpiece is then crowned with a cream cheese frosting so light and fluffy, it could double as a cloud in a children's book. When you cut into it, revealing those gorgeous layers of orange pie against the warm brown cake, you'll hear actual gasps from your guests. That first bite? Pure autumn magic that tastes like someone bottled up Thanksgiving itself and baked it into existence.
What makes this version different from every other piecaken recipe floating around the internet is that I've solved all the classic problems that plague this dessert. No more soggy bottom syndrome. No more pie sliding out like a drunk tourist on a water slide. No more cake that's dry enough to double as packing material. I've tested this recipe more times than I care to admit (my neighbors now run when they see me coming with "samples"), and I'm telling you – this is hands down the best version you'll ever make at home. The secret lies in the construction method, the temperature game, and one surprise ingredient that sounds weird but trust me on this one.
Okay, ready for the game-changer? We're going to partially freeze the pie before assembly, which sounds counterintuitive but creates the perfect barrier between pie and cake. Plus, I'm sharing my grandmother's spice blend that's been passed down through four generations of bakers who knew that the secret to great spice cake isn't just cinnamon – it's the careful balance of warmth, sweetness, and just enough kick to make your taste buds sit up and pay attention. Let me walk you through every single step — by the end, you'll wonder how you ever made it any other way.
What Makes This Version Stand Out
Temperature Magic: Most recipes get this completely wrong. They'll tell you to bake everything at once and wonder why you end up with raw cake and overcooked pie. Here's what actually works: we start the pie at a screaming hot 425°F to set the crust, then drop to 350°F for the custard. The cake gets its own temperature journey, ensuring both components reach their textural peak. This isn't just baking – it's thermal choreography.
Structural Integrity: I dare you to find another piecaken recipe that doesn't result in pie sliding syndrome. The secret? A cream cheese dam around the pie's edge that fuses with the cake batter, creating a delicious edible glue that keeps everything in place. It's like building a dessert fortress, except the walls are made of frosting and the moat is pure deliciousness.
Flavor Harmony: This is where I get a little obsessive. The pumpkin pie spices echo through both the pie and the cake, but each has its own personality. The pie leans heavy on cinnamon and nutmeg for that classic Thanksgiving comfort, while the cake gets ginger and cloves for warmth and complexity. When they meet in the middle, it's like a spice symphony where every note has its moment to shine.
Texture Contrast: Most piecakens end up with the textural excitement of wet cardboard. Not this one. The pie maintains its silky custard texture while the cake stays moist but with enough structure to support the whole operation. The cream cheese frosting adds a tangy cloud-like finish that makes each bite feel like you're eating dessert on a pillow of dreams.
Make-Ahead Marvel: Here's the real kicker – you can assemble this beauty up to two days ahead. The flavors actually meld and improve with time, making this the perfect stress-busting dessert for busy holiday cooks. I make the pie on Monday, assemble everything Tuesday, and by Thursday, it's reached its peak deliciousness while I'm free to focus on not burning the turkey.
Crowd Psychology: Bring this to your gathering and watch what happens. People can't resist the drama of those layers, the audacity of combining two desserts into one towering achievement. I've seen grown adults argue over corner pieces like they're fighting over the last lifeboat on the Titanic. This dessert doesn't just feed people – it creates memories and starts conversations.
Alright, let's break down exactly what goes into this masterpiece...
Inside the Ingredient List
The Flavor Base
Cream cheese is the unsung hero here, appearing in both the pie filling and the frosting. For the pie, it creates that luxurious texture that sets up perfectly without cracking, while in the frosting, it provides tangy stability that can hold up to room temperature for hours. Don't even think about using the low-fat stuff – I tried it once and ended up with frosting that wept like a disappointed parent. The full-fat version gives you that rich, indulgent mouthfeel that makes people close their eyes when they taste it. When you're buying, look for bricks that feel firm and have at least a month until expiration – older cream cheese can taste sour and metallic, which will ruin everything.
Granulated sugar isn't just for sweetness – it's a textural magician. In the pie, it helps create that smooth, glassy surface that makes professional bakers weep with joy. For the cake, it caramelizes slightly at the edges, creating those crispy corners that I personally fight people for. Brown sugar brings molasses notes that whisper autumn comfort, while powdered sugar in the frosting dissolves completely, leaving no grainy texture behind. I keep both light and dark brown sugar on hand because each brings its own personality to the party.
The Texture Crew
Heavy whipping cream is where things get interesting. In the pie, it lightens the cream cheese filling, creating that ethereal texture that practically floats off the fork. For the frosting, it's all about achieving those billowy peaks that hold their shape like tiny edible sculptures. The key is keeping everything cold – I even chill my beaters. Pro tip: save a tablespoon to brush over the pie before baking – it creates the most gorgeous golden sheen that'll make your Instagram followers think you're a professional food stylist.
Eggs are the binding agents that hold our dreams together. Three eggs in the pie create that perfect custard set – not too firm, not too jiggly, just right. For the cake, we're using oil instead of butter for moisture that lasts for days, but the eggs still provide structure and richness. Always use room temperature eggs unless specified otherwise – cold eggs can cause your batter to seize up like a startled deer, leading to dense, sad cake that nobody wants to eat.
The Unexpected Star
Here's where I might lose some of you, but stay with me here – this is worth it. We're using a store-bought pumpkin pie as our base. I know, I know, homemade everything sounds better, but here's the truth: a good quality store-bought pie has been tested by food scientists who understand exactly how pumpkin custard behaves. It's consistent, it's reliable, and it frees you up to focus on the cake and presentation. Plus, when you're already making a cake from scratch and frosting from scratch, sometimes you need to give yourself permission to take a shortcut that doesn't compromise the final result.
The Final Flourish
All-purpose flour seems basic, but it's the backbone of our cake. We're using a specific ratio that creates a tender crumb strong enough to support the pie but delicate enough to feel luxurious. Too much flour and you've got doorstop cake; too little and you're looking at dessert soup. The leavening agents – baking powder and our spice blend – need to be fresh. I replace mine every six months because old leavening agents are like old batteries – they look fine but they just don't have the power anymore.
Vanilla extract is my splurge ingredient. Imitation vanilla tastes like sadness and disappointment, while real vanilla beans add those gorgeous little flecks that scream "this person knows what they're doing." For the frosting, we're adding vanilla twice – once in the cream cheese mixture and again right at the end for that aromatic punch that hits your nose before your taste buds. That first whiff when you open the mixer? Absolute perfection.
Everything's prepped? Good. Let's get into the real action...
The Method — Step by Step
- First things first – we need to prep our pie for its cake cocoon. Remove your pumpkin pie from its packaging and place it on a parchment-lined baking sheet. Here's the crucial part: freeze this pie for at least 2 hours, but preferably overnight. I know this seems backward – we're going to bake it again, so why freeze it? Because partially frozen pie maintains its structure when we pour cake batter around it. Without this step, you'll end up with pie filling swirling into your cake like a dessert hurricane. While it freezes, make sure it's sitting perfectly level – use a small kitchen level if you're obsessive like me – because a tilted pie means a tilted final product that'll topple like a dessert Jenga tower.
- Now we craft our cream cheese dam, the unsung hero that prevents pie-slide disasters. Beat 8 ounces of room temperature cream cheese with 1/4 cup flour until it's smooth and spreadable – about 2 minutes on medium speed. This mixture should be thick enough to hold its shape but pliable enough to mold. Using a small offset spatula, spread this mixture around the rim of your pie, creating a 1/2-inch barrier that rises about 1/4 inch above the pie's edge. Think of it as insurance against cake batter seeping under your pie and creating soggy bottom syndrome. This step takes patience but it's what separates amateur hour from dessert mastery. Don't worry if it's not perfect – the cake batter will hide minor imperfections like delicious spackle.
- Time for the spice cake batter that'll cradle our pie treasure. In a medium bowl, whisk together 2 cups flour, 1 teaspoon baking powder, and all those gorgeous spices – cinnamon, ginger, nutmeg, cloves, and allspice. The smell should hit you like autumn in liquid form. In your stand mixer, cream together 1/2 cup butter and 1 cup brown sugar until it's light and fluffy, about 3-4 minutes. You're looking for a mixture that looks like wet sand but feels like heaven. Add the oil and eggs one at a time, beating well after each addition. The batter should look like it's trying to decide whether to be cookie dough or cake batter – that's exactly right.
- Here's where things get exciting – we're going to alternate adding dry ingredients and heavy cream to our butter mixture. Start with one-third of the flour mixture, mix on low until just combined, then add half the cream. Repeat this dance, ending with flour. The key is not overmixing – as soon as you see the last streak of flour disappear, stop the mixer. Overmixing develops gluten which gives you tough cake that could double as a doorstop. The batter should be thick but pourable, like a really expensive milkshake. If you've done this right, it should coat your spatula like velvet and smell like someone distilled fall into liquid form.
- Assembly time! Preheat your oven to 350°F and position the rack in the lower third – this prevents the top from browning too quickly. Take your frozen pie and place it in the center of a greased 10-inch springform pan. The frozen pie should fit with about 1 inch of space around the edges. Now, here's the magic moment: pour the cake batter around the pie, using a small spatula to guide it into all the nooks and crannies. The batter should come up about 3/4 of the way up the pie's sides. Don't panic if it looks like too much batter – we're creating a cake moat that'll bake up around our pie fortress. Gently tap the pan on the counter to release any air bubbles that could create cake sinkholes.
- Into the oven it goes for what I call the long bake – 45-55 minutes of pure suspense. Don't even think about opening that oven door for the first 40 minutes, or you'll create a temperature shock that'll make your cake collapse faster than my willpower around fresh cookies. After 40 minutes, you can peek – the cake should be pulling away from the sides of the pan, and a tester inserted into the cake (not the pie!) should come out with just a few moist crumbs. The top should be a gorgeous golden brown with slightly darker edges that smell like Thanksgiving morning. If the top is browning too quickly, tent it with foil for the last 15 minutes.
- Cooling is where most people mess up – they're too impatient and end up with frosting that melts into a sad puddle. Let your piecaken cool in the pan for 15 minutes, then run a thin knife around the edge to prevent sticking. Remove the springform ring but leave it on the pan base – this provides stability while it cools completely. Now comes the hard part: walk away for at least 2 hours. I mean it. Put it somewhere you can't see it if necessary. The pie needs time to set up properly, and the cake needs to cool so our frosting doesn't turn into a glaze. During this time, your kitchen will smell so incredible that you'll question every life choice that led you to not make this sooner.
- While everything cools, let's craft the frosting that'll make grown adults weep with joy. Beat 1 cup (2 sticks) of room temperature butter until it's pale and fluffy – about 5 minutes of patience that'll pay off in spades. Add the remaining cream cheese and beat until completely incorporated, scraping down the bowl obsessively. Nobody wants surprise cream cheese chunks in their frosting. Now add the powdered sugar one cup at a time, alternating with heavy cream. This prevents the sugar from creating a dust storm that'll have you finding sugar crystals in your kitchen for weeks. The final result should be light enough to spread but thick enough to hold peaks – like a cloud that decided to become frosting.
- The final assembly is where we transform from baker to artist. Place your completely cooled piecaken on a serving plate or cake stand – something sturdy because this baby has some heft. Pile the frosting on top and work it down the sides using an offset spatula. Don't aim for perfection – rustic swirls catch more frosting in each bite and hide any imperfections from our cake-pie union. If you want to get fancy, reserve some frosting and tint it with food coloring for decorative swirls, or sprinkle some candied pecans around the edge. But honestly? This dessert is so impressive on its own that you could serve it with a simple dusting of cinnamon and still have people asking for your autograph.
That's it — you did it. But hold on, I've got a few more tricks that'll take this to another level...
Insider Tricks for Flawless Results
The Temperature Rule Nobody Follows
Here's the thing that separates amateur bakers from dessert legends: temperature control isn't just important, it's everything. Your cream cheese must be genuinely room temperature – not "I took it out 30 minutes ago" temperature. I leave mine out overnight, covered, to achieve that perfect spreadable consistency. Same goes for eggs and butter in the cake – cold ingredients don't incorporate properly, leading to a batter that looks broken and bakes up with the texture of a kitchen sponge. But here's the twist: your heavy cream for whipping should be ice cold. I keep mine in the freezer for 15 minutes before whipping. This temperature dance is what creates the perfect textures throughout every component.
I'll be honest – I learned this the hard way after producing what my family now calls the "Great Thanksgiving Disaster of 2019," where everything was slightly the wrong temperature and the resulting dessert could've doubled as a doorstop. My cousin still brings it up every year, but now I use that embarrassment as motivation to get it right every time.
Why Your Nose Knows Best
Professional bakers don't just set timers – they use every sense, especially smell. When your cake is perfectly baked, your kitchen will smell like autumn exploded in the best possible way. If you start to smell something slightly toasty and nutty, that's your cue to check doneness. Too much longer and you'll hit burnt territory. Same with the pie – when the custard smells like pumpkin pie spice rather than raw spices, you're in the zone. This might sound like kitchen voodoo, but trust your senses. They've been refined over thousands of years of humans cooking food, and they're more reliable than any timer.
The 5-Minute Rest That Changes Everything
After you remove the piecaken from the oven, let it sit undisturbed for exactly 5 minutes before you even think about touching it. During this time, the carryover heat finishes setting the custard while the cake's structure stabilizes. I use this time to clean up my workspace and mentally prepare for the cooling process. Those five minutes feel like an eternity when you're excited to see your creation, but they're what prevent the cake from deflating or the pie from cracking. It's like a meditation moment, except instead of inner peace, you get perfect dessert structure.
The Overnight Advantage
Picture yourself pulling this out of the oven, the whole kitchen smelling incredible, and knowing that you could serve it immediately but choosing to wait. Sounds like torture, right? But here's the magic: this piecaken gets better overnight. The flavors meld and deepen, the textures settle into perfect harmony, and the whole dessert becomes more than the sum of its parts. I make mine on Tuesday for Thursday Thanksgiving, and by serving time, it's reached this zen state of dessert perfection that immediate gratification can't match. Wrap it loosely in plastic wrap once completely cool, and it actually improves with 24-48 hours of patience.
Creative Twists and Variations
This recipe is a playground. Here are some of my favorite ways to switch things up:
The Apple Orchard Version
Swap the pumpkin pie for an apple pie, and add dried apple chips to the cake batter for extra texture. Use maple extract instead of vanilla in the frosting, and top with candied pecans. This version tastes like apple picking in dessert form and is particularly stunning in early fall when apples are at their peak. The apple pie's slightly tart filling cuts through the richness of the cake in a way that'll have people asking for seconds before they've finished their first slice.
The Chocolate Rebel
For the chocoholics in your life (and really, who isn't one?), replace the spice cake with a rich chocolate cake and use a chocolate cream pie as the center. Add espresso powder to both the cake and frosting to deepen the chocolate flavor, creating a mocha masterpiece that coffee lovers will worship. The contrast between the dark chocolate cake and the light-colored frosting creates visual drama that makes this version perfect for holiday parties where you want to make a statement.
The Tropical Holiday
Okay, this one sounds crazy but stay with me here – this is worth it. Use a coconut cream pie and add shredded coconut and crushed pineapple (well-drained) to a yellow cake base. Replace the cream cheese frosting with coconut cream frosting and top with toasted coconut flakes. It's like someone took a tropical vacation and wrapped it in Thanksgiving tradition. Surprisingly, the flavors work beautifully together, creating a dessert that's familiar yet exotic enough to make people stop and think about what they're tasting.
The Nutty Professor
Add 1 cup of finely chopped toasted pecans to the cake batter and use a pecan pie as your center. The nuts add incredible texture and flavor depth, while the pecan pie's gooey filling creates a stunning contrast with the cake. Top with a brown butter cream cheese frosting for a nutty, caramel flavor that tastes like someone captured the essence of fall in the South. This version is particularly popular with people who claim they "don't like desserts too sweet" – the nuts and brown butter add enough complexity to balance the sweetness.
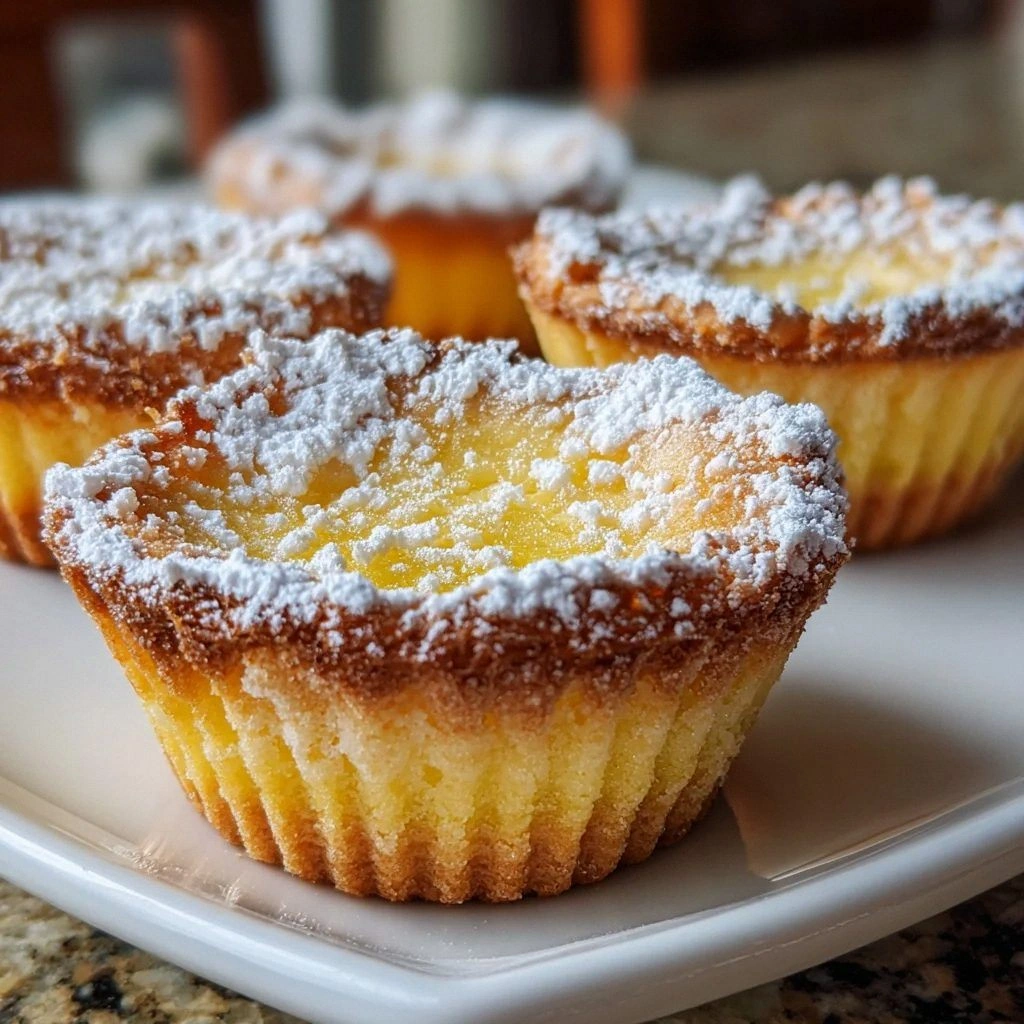
The Mini Marvels
Instead of one large piecaken, make individual servings using muffin tins and mini pies (available in the freezer section near the regular pies). These are perfect for parties where people want to try multiple desserts, and they're surprisingly easy to portion control – though I dare you to eat just one. The individual servings also freeze beautifully, so you can make a batch and have emergency desserts ready for unexpected guests or late-night cravings.
Storing and Bringing It Back to Life
Fridge Storage
Once completely cooled and frosted, your piecaken will keep beautifully in the refrigerator for up to 5 days. Wrap it loosely with plastic wrap, making sure the wrap doesn't touch the frosting surface – nobody wants frosting that tastes like plastic. The key is storing it in the coldest part of your fridge, usually the back of the bottom shelf, where the temperature stays most consistent. I actually think day 2-3 is the sweet spot where flavors have melded but everything still tastes fresh. If you've cut into it, press plastic wrap directly against the cut surfaces to prevent drying out.
Freezer Friendly
This dessert is surprisingly freezer-friendly, which makes it perfect for holiday prep. Wrap individual slices or the whole thing (if your freezer is large enough) in two layers of plastic wrap followed by a layer of foil. It'll keep for up to 2 months frozen, though I doubt it'll last that long. When you're ready to serve, transfer it to the refrigerator overnight to thaw slowly. Never thaw at room temperature – this creates condensation that'll turn your frosting into a weepy mess. Once thawed, let it come to room temperature for 30 minutes before serving for the best texture and flavor.
Best Reheating Method
Here's where things get interesting – you don't actually want to reheat this dessert. The pie filling is meant to be served cool or room temperature, and heating it will cause the custard to weep and separate. However, if you've stored it in the fridge and want to serve it slightly less cold, let it sit at room temperature for 30-45 minutes. This takes the chill off without compromising the structure. If your kitchen is particularly warm, 20-30 minutes is plenty. The frosting will soften slightly, making each bite taste like it was just made. Add a tiny splash of water to a slice before serving – it steams back to perfection by creating a micro-climate that refreshes the cake without making it soggy.