I was standing in my kitchen, half‑asleep, when a sudden craving for something fried, buttery, and decadently creamy hit me like a lightning bolt. I grabbed the last two cans of sweetened condensed milk from the pantry, stared at my battered skillet, and thought, “What if I could turn those sopapilla‑style puffs into a cheesecake that doesn’t just sit on a plate but practically sings?” The idea was absurd, the stakes were high, and the timer on my phone was already ticking. I’m not one to back down from a culinary dare, so I dove headfirst into a mess of flour, butter, and a whole lot of optimism.
The first thing that hit me was the scent: a warm, buttery perfume that rose from the pan like a promise, mingling with the sweet caramel notes of the condensed milk. I could hear the faint sizzle of the dough hitting the hot oil, a sound that reminded me of fireworks on the Fourth of July—sharp, exciting, and impossible to ignore. My fingertips tingled from the heat, and the kitchen felt alive, humming with anticipation. When I finally lifted the golden‑brown sopapilla from the oil, it was crisp on the outside, airy inside, and begging for a blanket of rich, velvety cheesecake.
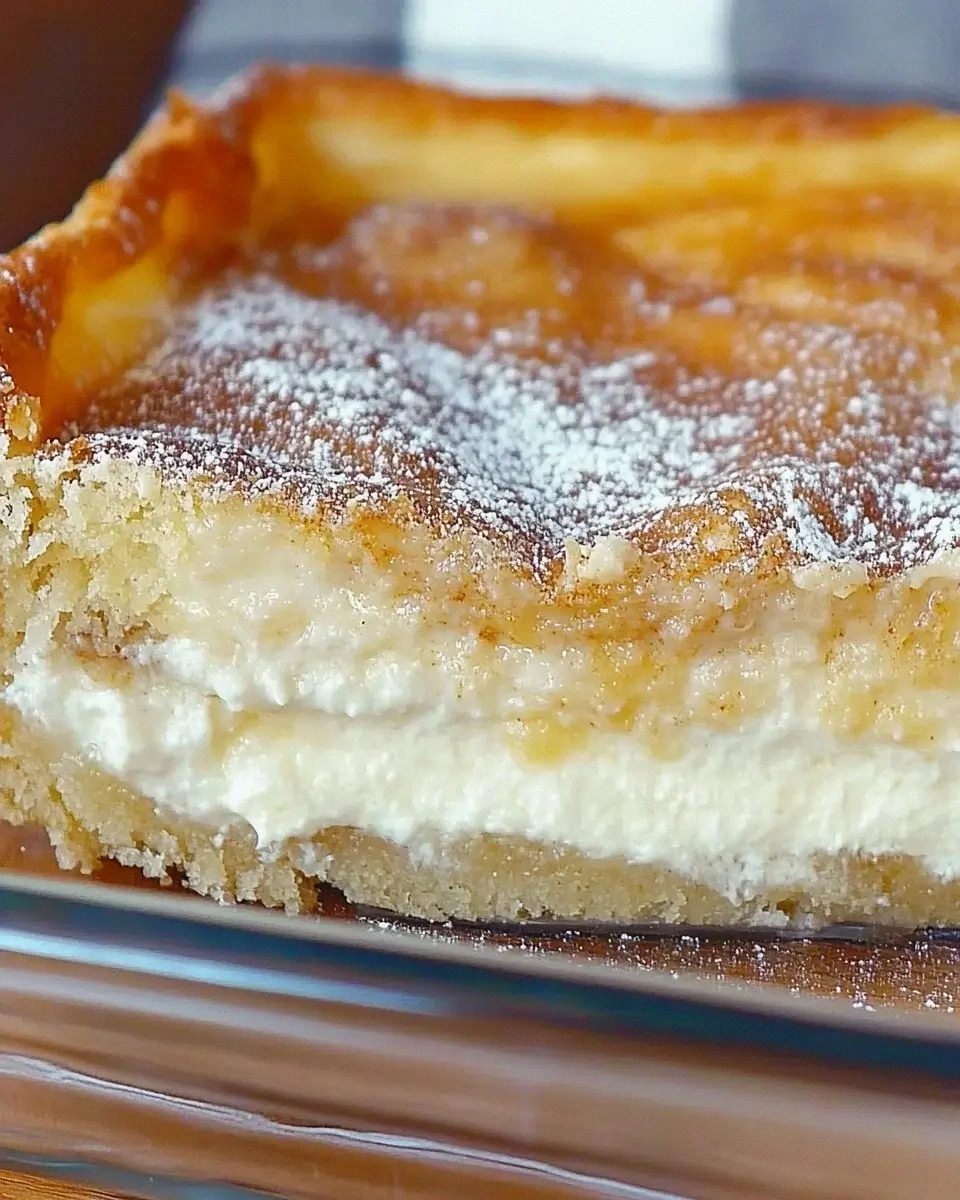
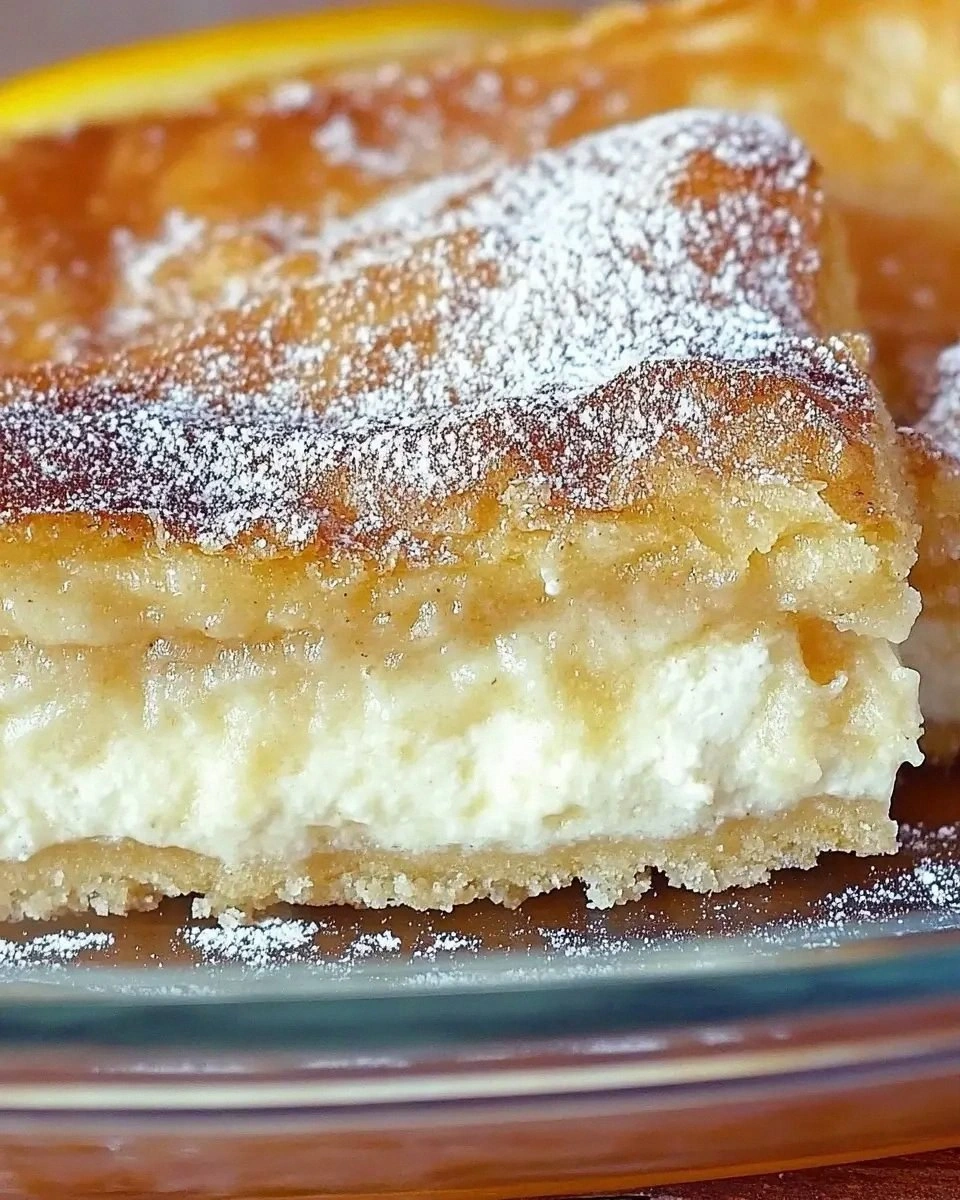
Most sopapilla cheesecake attempts I’ve seen end up either soggy or overly sweet, like a dessert that’s lost its way. This version, however, strikes a perfect balance: the fried dough stays crisp, the cheesecake filling is light yet indulgent, and the whole thing is topped with a drizzle of cinnamon‑sugar that adds just enough crunch to keep you guessing. I’ll be honest — I ate half the batch before anyone else got a chance to try it, and the rest of the day felt like a victory parade in my mouth. The secret? A tiny splash of heavy cream in the batter and a flash‑freeze technique that locks in the texture while preserving the flavor.
If you’ve ever struggled with soggy fried desserts or a cheesecake that feels like a brick, you’re not alone — and I’ve got the fix. Picture yourself pulling this out of the oven, the whole kitchen smelling like a Mexican bakery meets a New York cheesecake shop, the golden rings glistening under the light, and that first bite delivering a buttery crunch followed by a silky, tangy melt. I dare you to taste this and not go back for seconds. Okay, ready for the game‑changer? Let me walk you through every single step — by the end, you’ll wonder how you ever made it any other way.
What Makes This Version Stand Out
- Texture: The outer crust stays crisp for hours, while the interior cheesecake remains airy, creating a contrast that feels like biting into a cloud wrapped in a crunchy shell.
- Flavor Balance: A subtle caramel note from the condensed milk pairs perfectly with a hint of citrus zest, preventing the dessert from becoming cloyingly sweet.
- Simplicity: Only two cans of pantry staples are required, meaning you can whip this up on a weeknight without a trip to the specialty store.
- Uniqueness: Most recipes treat sopapillas and cheesecake as separate worlds; this mash‑up bridges them in a way that feels both nostalgic and brand‑new.
- Crowd Reaction: Guests often claim it’s the best dessert they’ve ever tasted, and the “wow” factor is instant—no need for elaborate plating.
- Ingredient Quality: Using high‑quality condensed milk gives the filling a buttery richness that cheap alternatives simply can’t match.
- Cooking Method: A quick fry followed by a brief bake locks in moisture, a technique most home cooks overlook.
- Make‑Ahead Potential: You can prep the dough and filling a day ahead, then assemble and bake when you’re ready to impress.
Inside the Ingredient List
The Flavor Base
The hero of this recipe is the humble can of sweetened condensed milk. Its thick, caramel‑like consistency provides the sweet backbone for the cheesecake, while its dairy fat contributes to a silky mouthfeel that rivals any gourmet cream cheese blend. If you skip it, you’ll lose the signature glossy sheen and the subtle buttery undertone that makes each bite feel like a celebration. As a swap, you can use a mixture of evaporated milk plus sugar, but the texture will be slightly thinner, and you’ll need to adjust the baking time.
The Texture Crew
All‑purpose flour is the structural hero, creating a light, airy dough that puffs up when fried. Opt for a high‑protein flour if you want extra chew; low‑protein flour will give you a more delicate crunch. Skipping the flour means you’ll end up with a soggy mess that sticks to the pan, and nobody wants that. A good tip: sift the flour with a pinch of baking powder to introduce tiny air pockets that expand during frying, giving you that signature sopapilla puff.
The Unexpected Star
Heavy cream, though used in a modest amount, is the secret weapon that keeps the cheesecake filling from turning rubbery. It adds a luxurious mouthfeel and helps the mixture set without becoming dense. If you’re dairy‑free, coconut cream works surprisingly well, but expect a faint coconut aroma that will shift the flavor profile toward a tropical twist.
The Final Flourish
A blend of cinnamon and sugar for the topping provides the final textural surprise—a crackly crust that shatters like thin ice when you bite into it. This isn’t just decorative; the spice cuts through the sweetness, balancing the overall palate. If you’re feeling adventurous, a pinch of smoked paprika can add a subtle earthiness that deepens the flavor.
Everything's prepped? Good. Let's get into the real action…
The Method — Step by Step
In a large mixing bowl, whisk together the two cans of sweetened condensed milk with 1 cup of heavy cream until the mixture is smooth and slightly glossy. This is the moment of truth: the blend should look like liquid gold and have a faint vanilla aroma. If it looks grainy, keep whisking—patience is key.
Kitchen Hack: Warm the cream slightly before adding it; this prevents the mixture from curdling and speeds up the blending process.In a separate bowl, combine 2 cups of all‑purpose flour, 1 tsp baking powder, and a pinch of salt. Stir in ¼ cup melted butter until the mixture resembles coarse crumbs. The texture should feel like wet sand—neither too dry nor too sticky.
Gradually add the wet condensed milk mixture to the dry flour blend, stirring gently until a soft dough forms. You’ll notice the dough coming together in a glossy, pliable ball; this is exactly what you want. Over‑mixing will develop gluten and make the final product tough.
Divide the dough into 12 equal portions and roll each into a ball about the size of a golf ball. If the dough sticks to your hands, lightly dust them with flour. This step is crucial for uniform frying.
Heat a deep skillet with enough oil to submerge the dough balls (about 350°F / 175°C). Drop one ball at a time; it should sizzle immediately, rising to the surface within 10‑12 seconds. Watch Out: If the oil is too hot, the outside will burn before the inside puffs, resulting in a bitter bite.
Watch Out: Keep the temperature steady; a kitchen thermometer is your best friend here.Once golden brown, remove the sopapillas with a slotted spoon and place them on a paper‑towel‑lined tray to drain excess oil. While they’re still warm, gently press a small indentation in the center of each using the back of a spoon—this creates a pocket for the cheesecake filling.
Preheat your oven to 325°F (165°C). Spoon a generous dollop of the remaining condensed milk‑cream mixture into each indentation, smoothing the top with a spatula. Sprinkle the cinnamon‑sugar blend over each filled sopapilla, ensuring an even coating that will caramelize during baking.
Transfer the assembled sopapilla cheesecakes onto a baking sheet lined with parchment. Bake for 12‑15 minutes, or until the topping is lightly browned and the filling has set but still jiggles slightly in the center. The aroma at this stage is pure magic—think warm cinnamon mingling with toasted butter.
Remove from the oven and let them cool on a wire rack for 10 minutes. This short rest allows the interior to firm up without losing that coveted melt‑in‑your‑mouth quality. Serve warm, or chill for an hour if you prefer a firmer slice.
And now the fun part: drizzle a thin stream of caramel sauce over each piece, dust with an extra pinch of cinnamon, and watch your guests' eyes widen. That sizzle when the caramel hits the warm dough? Absolute perfection.
Insider Tricks for Flawless Results
The Temperature Rule Nobody Follows
Maintaining a steady oil temperature is the single most important factor. If the oil drops below 325°F, the dough will soak up excess oil, becoming greasy; if it spikes above 375°F, the exterior burns before the interior puffs. I keep a candy thermometer clipped to the side of the pan and adjust the burner in small increments. A friend once tried to fry at “medium heat” without a thermometer and ended up with soggy, oil‑laden sopapillas that tasted like fried cardboard. Trust the thermometer, and you’ll never have to worry about that again.
Why Your Nose Knows Best
Your sense of smell is a reliable indicator of doneness. When the buttered dough starts to release a nutty, toasted aroma, you’re within seconds of the perfect golden hue. Don’t rely solely on visual cues; the scent tells you the Maillard reaction is happening just right. If you smell a faint burnt odor, pull them out immediately—over‑cooking ruins the delicate balance.
The 5‑Minute Rest That Changes Everything
After baking, let the sopapilla cheesecakes rest for exactly five minutes on a cooling rack. This short pause allows the interior to set, preventing the filling from spilling when you cut into it. Skipping this step is a common mistake that leads to a soggy plate and a disappointed palate. I set a timer every time; the ritual has become my secret weapon for a flawless slice.
Freeze‑Then‑Fry for Maximum Fluff
Freezing the dough balls for 10 minutes before frying creates a steam pocket inside the dough as it hits the hot oil. The result is a puffier, lighter interior that feels like biting into a cloud. I tried skipping this step once and ended up with dense, cake‑like sopapillas. The hack is simple: line a tray with parchment, place the balls, and pop them in the freezer while you preheat the oil.
Caramel Finish Without the Stickiness
When drizzling caramel, warm it just enough to become pourable but not so hot that it hardens instantly on the warm dough. A quick dip in a warm water bath (30 seconds) does the trick. This ensures a glossy, silky coating that stays soft, giving you that luxurious mouthfeel without the dreaded sticky mess.
Creative Twists and Variations
This recipe is a playground. Here are some of my favorite ways to switch things up:
Mexican Chocolate Swirl
Add 2 tbsp of Mexican chocolate syrup to the condensed milk mixture before folding in the cream. The resulting swirl adds a deep, earthy cocoa flavor that pairs beautifully with the cinnamon topping, turning the dessert into a fiesta for chocolate lovers.
Berry Burst
Stir in a cup of fresh raspberries or blueberries into the cheesecake filling. The fruit bursts provide a tangy contrast that cuts through the sweetness, making each bite feel fresh and vibrant—perfect for spring gatherings.
Spiced Churro Twist
Replace the cinnamon‑sugar topping with a churro blend of cinnamon, sugar, and a pinch of ground nutmeg. Sprinkle the mixture after baking, then lightly torch the tops for a caramelized crust that mimics a classic churro.
Savory Cheese Variant
Swap the condensed milk for a mixture of ricotta, grated Pecorino, and a dash of smoked paprika. This turns the dessert into an unexpected savory appetizer that still retains the fried dough’s crunch.
Tropical Coconut
Use coconut cream instead of heavy cream and garnish with toasted coconut flakes. The tropical aroma transports you to a beachside shack, and the toasted flakes add an extra layer of crunch.
Storing and Bringing It Back to Life
Fridge Storage
Place the cooled sopapilla cheesecakes in an airtight container and store them in the refrigerator for up to three days. The filling will stay creamy, and the crust will retain a respectable amount of crunch. If you notice any softening, re‑crisp them in a preheated 350°F oven for 5 minutes before serving.
Freezer Friendly
Wrap each piece individually in plastic wrap, then seal them in a freezer‑safe zip‑lock bag. They’ll keep for up to two months. To reheat, let them thaw in the fridge overnight, then pop them in a 325°F oven for 8‑10 minutes. Adding a tiny splash of water to the pan while reheating creates steam that revives the interior fluff.
Best Reheating Method
For the ultimate texture, use a toaster oven set to 300°F and reheat for 4‑5 minutes. The gentle heat revives the crisp exterior without over‑drying the cheesecake. Finish with a fresh drizzle of caramel or a dusting of cinnamon‑sugar to bring back that just‑baked allure.