I was in the middle of a midnight snack run, rummaging through the pantry for something that could satisfy my sudden craving for chocolatey goodness. The fridge was empty except for a lonely jar of peanut butter and a box of marshmallows that had been sitting there since last Christmas. I thought, why not mash them together with chocolate? The idea sounded like a recipe for disaster, but I decided to test it anyway. The result was a glorious mess that turned into a masterpiece.
The first thing I noticed was the aroma – a rich, buttery chocolate scent that mingled with the sweet, nutty perfume of peanut butter. As I stirred the mixture, the chocolate chips clinked like tiny bells, and the marshmallow fluff began to swirl into a glossy, cloud‑like ribbon. When I scooped a spoonful onto a plate, the sound of it sinking into the batter was a satisfying, soft crackle. The texture felt like velvet, with a hint of crunch from the peanut butter bits. I could already taste the layers: a deep chocolate core, a buttery peanut butter crust, and a sweet, airy top.
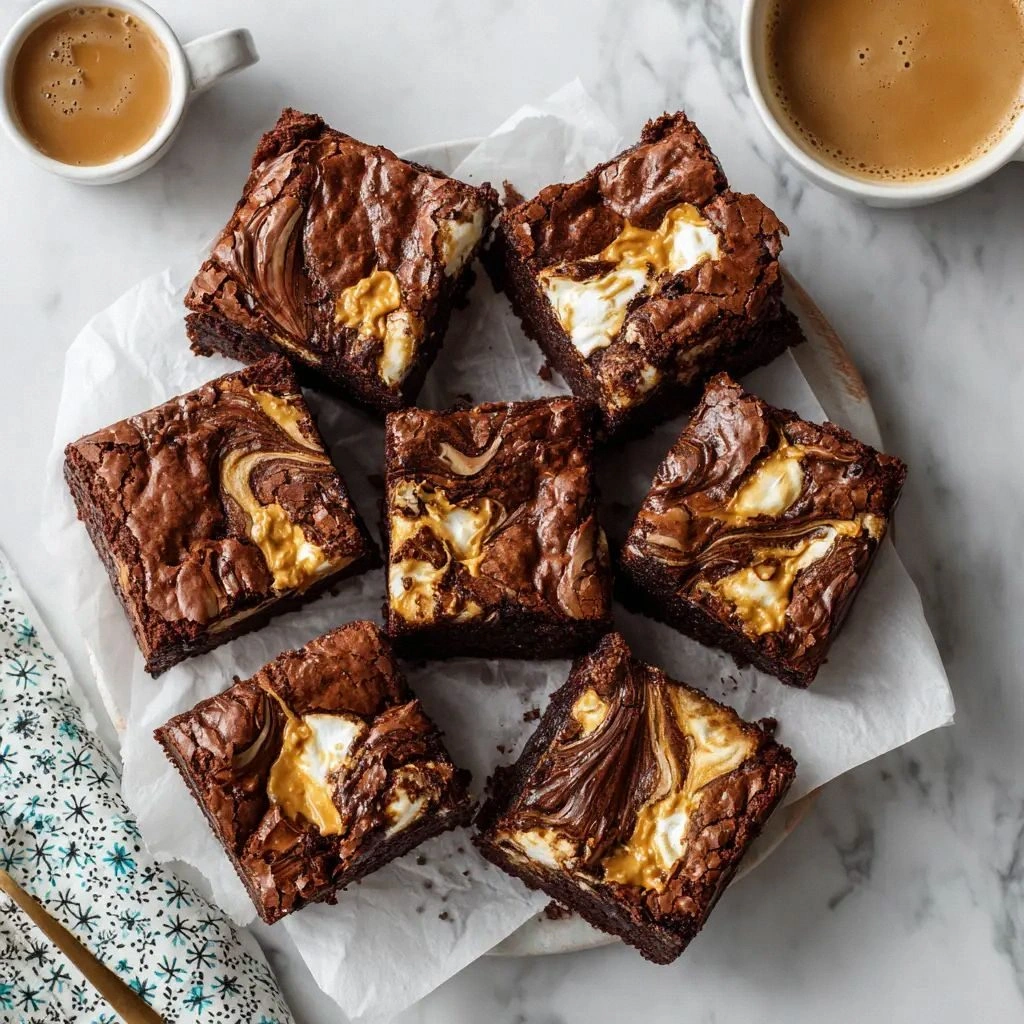
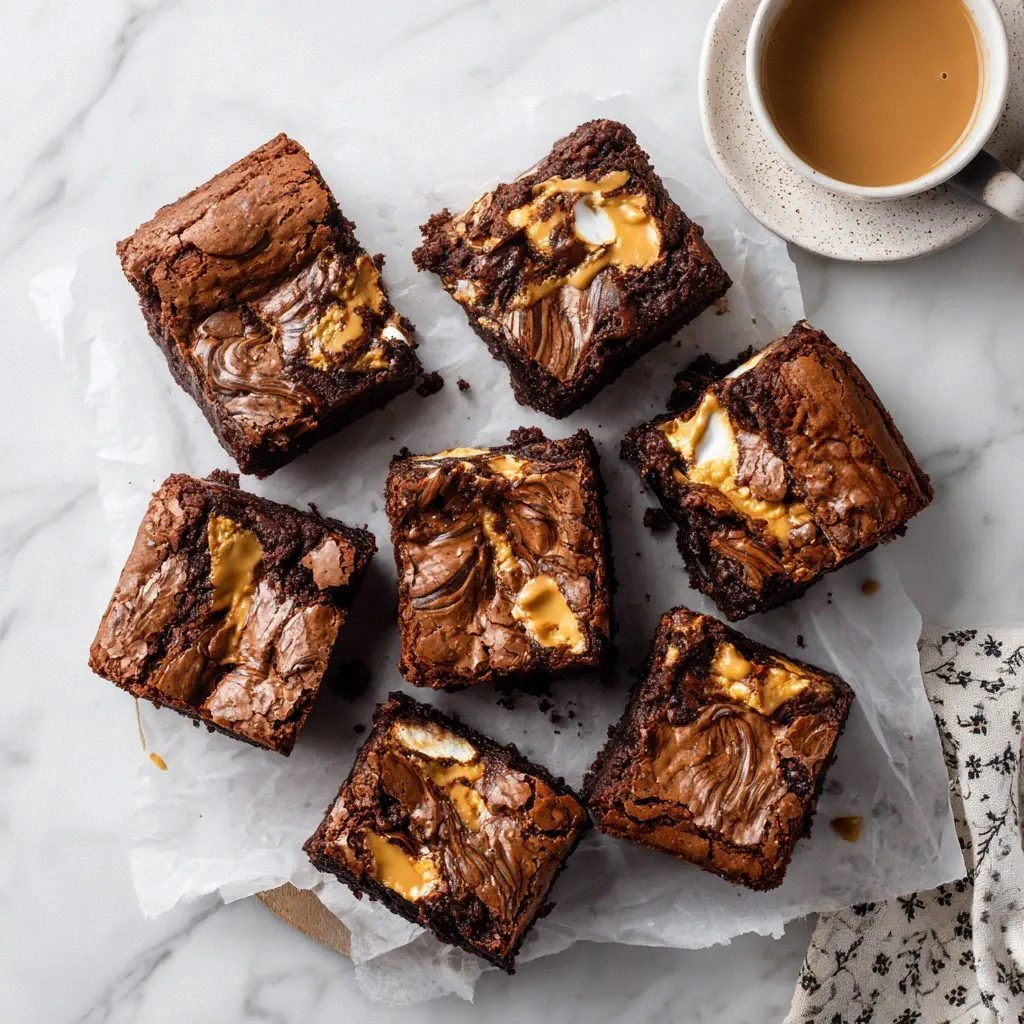
I laughed at the absurdity of calling it a “fluffernutter brownie” – a mashup of two classic treats that never seemed to fit together. But the first bite shattered that doubt; the chocolate melted into a silky stream, while the peanut butter added a salty, nutty depth that balanced the sweetness. The marshmallow fluff floated like a cloud on top, giving a lightness that made each square feel like a bite of heaven. I could hear the kitchen clock ticking, and each second felt like a countdown to indulgence. The moment I finished the first square, I realized I had stumbled upon something that could change my dessert game forever.
Most brownie recipes I’ve tried before had either been too dry or too cakey, but this one hit the sweet spot of fudgy center and chewy edges. The combination of unsalted butter, semi-sweet chocolate chips, and a blend of sugars creates a moist, dense texture that clings to your teeth. Peanut butter adds a rich, nutty flavor that cuts through the chocolate, while the marshmallow fluff gives a surprising, almost cotton‑candy finish. I dare you to taste this and not go back for seconds; the first bite will have you craving more. And if you’re skeptical, just imagine the kitchen filling with the smell of chocolate and peanut butter as the brownies bake.
Picture yourself pulling these out of the oven, the whole kitchen smelling incredible, and a tray of golden squares waiting for you. The edges will be crisp, the center molten, and the swirl of peanut butter and marshmallow will gleam like a promise of decadence. I know you’ll be tempted to take a photo before you even taste them, but trust me, the real magic happens when you bite. This is hands down the best version you'll ever make at home, and I’m here to show you how to replicate it step by step. Let me walk you through every single step – by the end, you'll wonder how you ever made it any other way.
What Makes This Version Stand Out
- Flavor Fusion: The marriage of chocolate, peanut butter, and marshmallow creates a layered taste that feels like a dessert inside a dessert. Each bite starts with a chocolatey bite, then a nutty twist, and finishes with a sweet, airy note.
- Texture Perfection: The batter is dense enough to hold its shape yet soft enough to melt in your mouth. The peanut butter bits add a subtle crunch, while the marshmallow fluff keeps the top light and fluffy.
- Simple Ingredients: No fancy liqueurs or obscure spices are required. All you need is pantry staples, making it an instant go-to for any baking session.
- Crowd‑Pleaser: Friends and family will be begging for seconds, and you’ll be the hero who brought this crowd‑pleaser to the table. The visual swirl alone will draw a line at the kitchen counter.
- Make‑Ahead Friendly: These brownies keep well in an airtight container for up to a week, and they freeze beautifully for longer storage. That means you can bake a batch for the week and enjoy them later.
- Balanced Sweetness: The combination of granulated and brown sugar, along with the peanut butter, balances the sweetness so that no single flavor overwhelms the others.
- Visual Appeal: The swirl of peanut butter and marshmallow on top gives an Instagram‑ready look that’s as satisfying to watch as it is to eat.
- Time‑Efficient: From prep to bake, the entire process takes less than an hour, making it a quick treat for busy nights.
Inside the Ingredient List
The Flavor Base
Unsalted butter is the heart of the batter, providing a buttery richness that coats every bite. When melted and mixed with chocolate chips, it creates a glossy, molten center that is impossible to resist. If you skip the butter, the brownies will feel dry and lack depth. For a subtle twist, try using salted butter and reduce the added salt by half.
Semi‑sweet chocolate chips give the brownies a balanced sweetness and a rich, chocolatey flavor. They also melt evenly, creating a silky texture that contrasts with the peanut butter. If you prefer a more intense cocoa taste, swap them for dark chocolate chips or chopped dark chocolate.
The Texture Crew
Granulated sugar provides a crispness that balances the softness of the batter, while packed brown sugar adds moisture and a hint of caramel flavor. Together, they create a chewy, fudgy crumb that clings to the teeth. If you omit brown sugar, the brownies will be slightly less moist and lose some of their caramel undertone.
Large eggs act as a binder, holding the batter together and contributing to the structure. The yolks add richness, while the whites provide lift. Skipping eggs will result in a crumbly, less cohesive brownie. For a vegan version, substitute with flaxseed meal and water or a commercial egg replacer.
The Unexpected Star
Vanilla extract is the subtle hero that rounds out the flavors, adding warmth and depth. A splash of vanilla turns the batter from plain to extraordinary. If you’re allergic to vanilla, a pinch of almond extract can give a similar aromatic lift.
The Final Flourish
All‑purpose flour provides structure, but too much can make the brownies tough. The measured 3/4 cup keeps the batter moist and chewy. If you’re looking for a gluten‑free version, substitute with a 1:1 gluten‑free blend.
Unsweetened cocoa powder adds depth and a subtle bitterness that balances the sweetness. It also intensifies the chocolate flavor without adding extra sugar. Skipping cocoa will make the brownies taste more like chocolate chips alone.
Salt is a flavor enhancer that brightens every component. Even a small pinch lifts the overall taste. If you’re watching sodium, use sea salt sparingly.
Creamy peanut butter is the star of the show, adding a nutty, savory note that cuts through the sweetness. It also contributes to the moistness and creates a delightful contrast. If you prefer a different nut, almond butter works well, but the flavor profile will shift slightly.
Marshmallow fluff provides a sweet, airy topping that melts into a silky glaze. Its lightness balances the dense brownie, creating a layered texture. If you’re allergic to egg whites, look for a vegan marshmallow alternative.
Everything's prepped? Good. Let's get into the real action…
The Method — Step by Step
- Preheat and Prep: Set your oven to 350°F (175°C) and line a 9x9-inch baking pan with parchment paper, leaving a small overhang on the sides for easy removal. This step ensures even baking and a clean release. The scent of preheating oven will start to mingle with the butter and chocolate aromas. If you’re in a hurry, use a silicone pan for a no‑stick option. The final result will be a perfectly baked base that’s ready for the swirl.
- Melt the Butter: Place the butter in a medium saucepan over low heat. Stir until fully melted, watching for it to bubble lightly. The gentle heat preserves the butter’s flavor and prevents it from scorching. Once melted, remove from heat and let it cool slightly; this prevents the eggs from cooking when added. The butter’s silky sheen will set the tone for the rest of the batter.
- Blend the Chocolate: Add the chocolate chips to the warm butter and stir until smooth. The heat from the butter melts the chips, creating a glossy chocolate sauce. Use a silicone spatula to scrape the bottom of the pan; this ensures an even distribution. The chocolate should have a glossy sheen, indicating it’s ready to combine with the sugars. A smooth sauce guarantees a uniform texture in the final brownie.
- Combine Sugars: Stir in granulated and brown sugar until fully integrated. The sugars dissolve into the chocolate mixture, creating a smooth base. The brown sugar adds moisture and a subtle caramel note. If you prefer a crunchier texture, sprinkle a tablespoon of chopped pecans or walnuts on top before baking.
- Watch Out: Egg Integration: Crack the eggs into a separate bowl, beat lightly, then add them to the chocolate mixture. Stir vigorously for 30 seconds to fully incorporate. The eggs act as a binder and add structure. If you add the eggs too slowly, they may curdle, leading to a lumpy batter. The batter should be smooth, glossy, and slightly thick.
- Add Vanilla and Peanut Butter: Pour vanilla extract and creamy peanut butter into the batter. Whisk until the peanut butter is fully incorporated and the mixture becomes a uniform, slightly lumpy consistency. The peanut butter introduces a nutty richness that complements the chocolate. The batter should look thick but pourable, ready for the final dry ingredients.
- Fold in Dry Ingredients: Sift together all‑purpose flour, unsweetened cocoa powder, and salt. Gradually add this dry mix to the wet batter, folding gently until just combined. Avoid overmixing to keep the brownies tender. The batter will thicken slightly but remain spreadable. A few lumps are acceptable; they will disappear during baking.
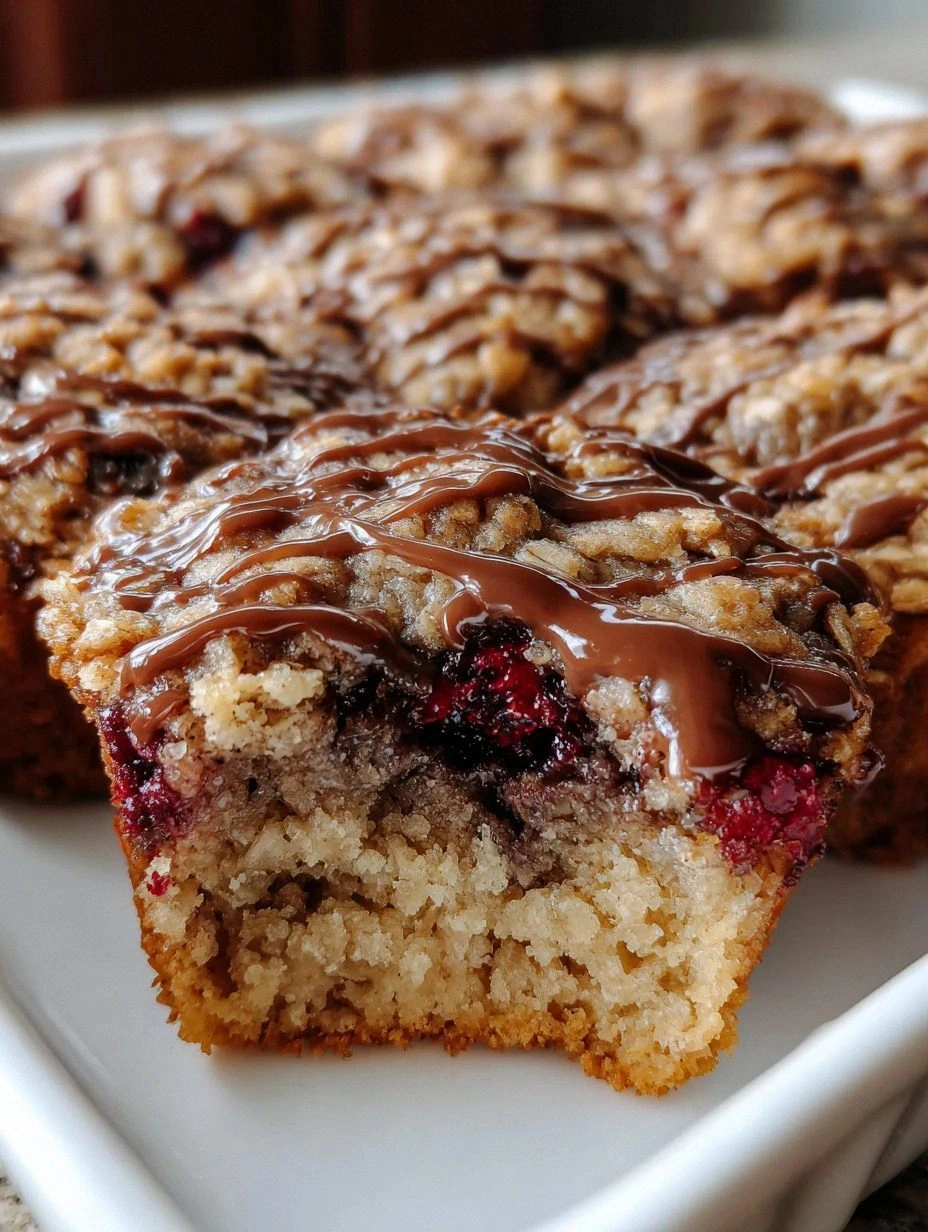
- Swirl the Magic: Pour the batter into the prepared pan and spread evenly with a spatula. In a separate bowl, combine marshmallow fluff and peanut butter until smooth. Drop spoonfuls of the fluff mixture onto the batter, then use a knife or toothpick to create a marbled swirl. The swirl should be visible but not too thick; the goal is a subtle, elegant pattern. This step transforms the brownies into a visual masterpiece.
- Bake to Perfection: Place the pan in the preheated oven and bake for 30 minutes, or until a toothpick inserted into the center comes out with a few moist crumbs. The edges should be slightly firm, while the center remains soft and slightly gooey. Avoid overbaking, as the brownies will dry out. Once baked, let them cool in the pan for 10 minutes before transferring to a wire rack. This cooling period allows the flavors to settle and the swirl to set.
- Cut and Serve: After the brownies have cooled completely, lift them out of the pan using the parchment overhang. Slice into squares using a hot, damp knife for clean cuts. Serve immediately for a warm, gooey experience, or store in an airtight container for later. If you’re feeling adventurous, drizzle melted chocolate over the top for an extra decadent touch. Enjoy each bite, and watch your friends ask for the recipe.
That's it — you did it. But hold on, I've got a few more tricks that'll take this to another level…
Insider Tricks for Flawless Results
The Temperature Rule Nobody Follows
Many bakers bake brownies at a high temperature for a short time, which can lead to uneven textures. I recommend baking at 350°F (175°C) for 30 minutes. This slower bake allows the chocolate to melt fully while keeping the edges tender. The result is a brownie that’s fudgy inside and perfectly crisp on the edges. If you’re in a rush, a quick 15‑minute bake at 400°F can work, but the texture will differ.
Why Your Nose Knows Best
Before you even take a bite, close your eyes and sniff the batter. A strong chocolate aroma indicates the chocolate is fully melted. If the smell is faint, let the batter rest for a few minutes; the chocolate will continue to melt.
The 5‑Minute Rest That Changes Everything
After removing the brownies from the oven, let them rest in the pan for 10 minutes before cutting. This rest period allows the internal structure to set, making the brownies easier to slice. Skipping this step often results in a crumbly mess when you try to cut them.
Swirl Technique for a Polished Look
When swirling the marshmallow fluff, use a toothpick to create a subtle pattern. The key is to keep the swirl thin; a thick swirl can look uneven and may break when cutting. A light touch gives a professional, Instagram‑ready finish.
Choosing the Right Baking Pan
For even baking, use a non‑stick or silicone pan. If you use a metal pan, line it with parchment to prevent sticking. A 9x9-inch pan is standard, but you can use a 9x13-inch pan for larger batches.
Cooling on a Wire Rack
After the 10‑minute rest, place the brownies on a wire rack to cool completely. This prevents the bottom from becoming soggy. A cool, dry environment also helps the swirl pattern to set properly.
Creative Twists and Variations
Chocolate‑Chili Swirl
Add a pinch of cayenne pepper or a splash of espresso to the batter for a spicy kick. The chili enhances the chocolate flavor, while the espresso deepens the aroma. This variation is perfect for those who love a little heat in their desserts.
Nutty Crunch Upgrade
Fold in chopped pecans or walnuts before baking. The nuts add a satisfying crunch and a buttery flavor that complements the peanut butter. This version works great for a holiday gathering.
Vegan Delight
Replace butter with coconut oil, use flaxseed meal instead of eggs, and choose a vegan marshmallow alternative. The result is a completely plant‑based brownie that still delivers the same indulgent texture.
Salted Caramel Twist
Drizzle salted caramel sauce over the top after baking. The caramel adds a sweet, buttery layer that pairs wonderfully with the peanut butter and chocolate. Sprinkle a pinch of sea salt for a refined finish.
Almond Butter Variation
Swap peanut butter for almond butter to create a nutty, slightly sweeter profile. The almond butter adds a subtle floral note that pairs well with the chocolate. This variation is ideal for those with peanut allergies.
Minty Freshness
Add a teaspoon of peppermint extract to the batter. The mint complements the chocolate and gives a refreshing finish. Be careful not to overdo it; a little goes a long way.
Storing and Bringing It Back to Life
Fridge Storage
Place the brownies in an airtight container or wrap them tightly in plastic wrap. They will stay fresh for up to a week. The airtight seal prevents the brownies from drying out and maintains the fudgy texture.
Freezer Friendly
Wrap each brownie square individually in parchment paper, then place them in a freezer bag. Freeze for up to three months. When ready to eat, let them thaw at room temperature for 15 minutes before reheating.
Best Reheating Method
To reheat, place a few brownies on a microwave‑safe plate and microwave on low power for 15–20 seconds. Add a tiny splash of water to the plate before reheating; this steams the brownies back to perfection. Alternatively, heat them in a preheated oven at 300°F for 5 minutes.