Introduction
Picture this: a Saturday afternoon, the kitchen clock ticking toward midnight, and you, armed with a bag of oats and a craving that feels like a guilty secret. I was trying to rescue a batch of stale bread from the pantry, only to realize the oven was too hot and the dough had turned into a rubbery mess. The moment the dough hit the counter, I whispered, “This is going to be epic.” And, honestly, the aroma that followed—warm, nutty, and slightly sweet—was a promise of something extraordinary.
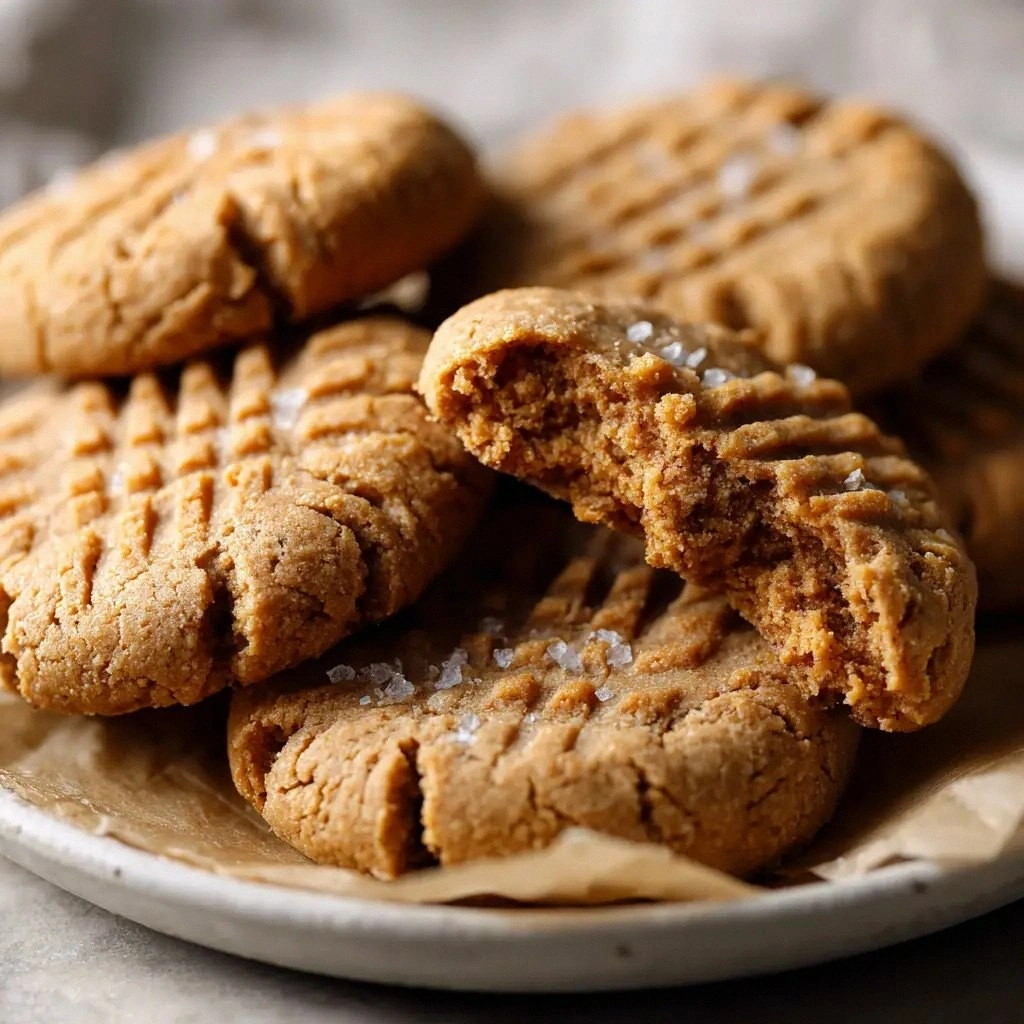
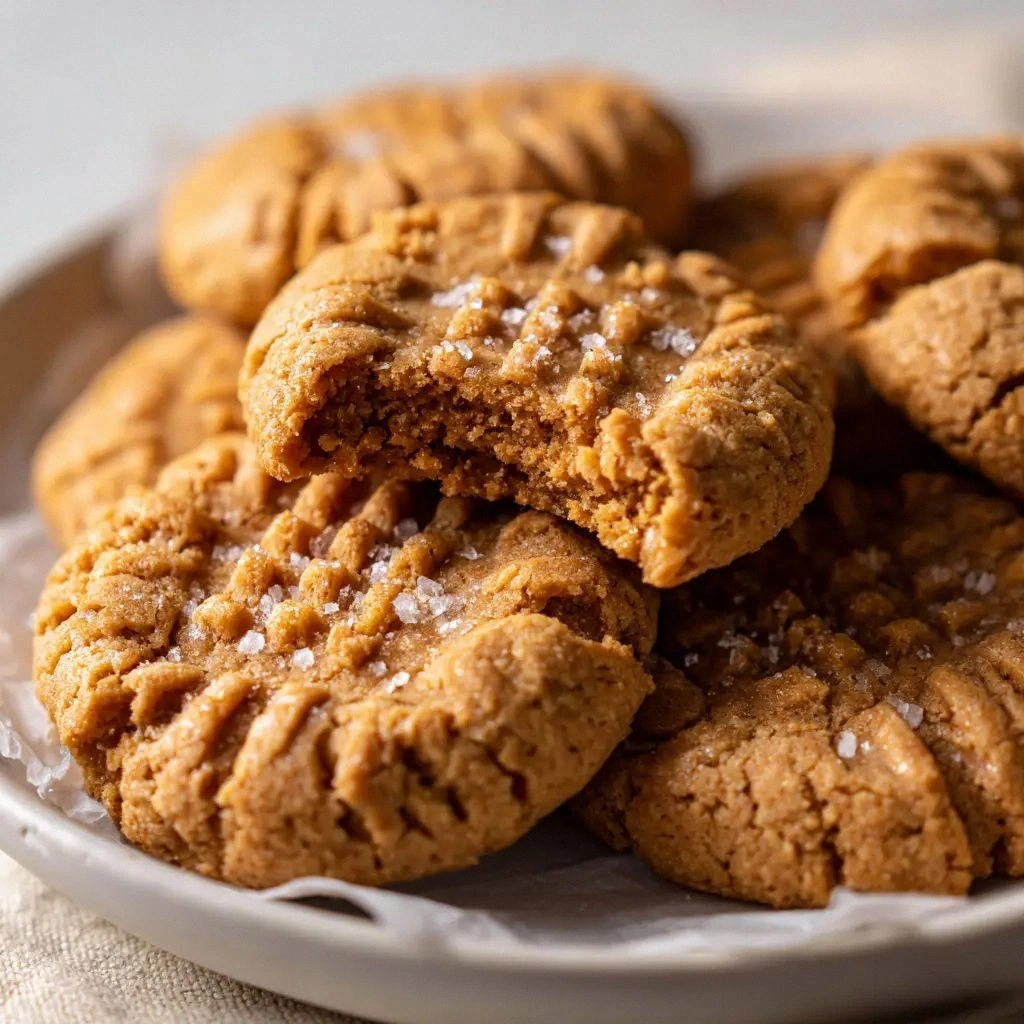
In the world of cookie recipes, there’s a common narrative: a perfect balance between crunch and chew, a hint of salt, and a dash of decadence. What makes this version a standout? It’s the way the oat flour gives a hearty, grainy texture that feels like a hug, while the creamy peanut butter creates a silky, almost buttery mouthfeel that lingers. The result is a cookie that is thick, chewy, and utterly irresistible—so much so that I dared you to taste this and not go back for seconds.
I’m not just talking about a cookie; I’m talking about a culinary revelation that turns a simple snack into a memory. The combination of light brown sugar and granulated sugar brings a caramelized depth, while the double dose of sea salt—fine for flavor and flaky for that satisfying bite—creates a sophisticated flavor profile. The peanut butter, the hero of this recipe, is not just a sweet spread but a source of protein that makes the cookie feel substantial, almost like a dessert that can double as a snack.
What’s the secret sauce that makes this recipe a game-changer? It’s the subtle technique of preheating the oven to 350°F, letting the dough rest for five minutes, and then baking until the edges are golden but the centers remain soft. This small tweak ensures that each bite is a perfect marriage of crisp and chew. Let me walk you through every single step — by the end, you’ll wonder how you ever made it any other way.
What Makes This Version Stand Out
- Texture: The oat flour gives a hearty bite that’s still tender, while the peanut butter adds a creamy, melt-in-your-mouth center. The result is a cookie that feels substantial yet light, a paradox that delights the palate. It’s the kind of cookie that you can’t stop nibbling because it never feels heavy.
- Flavor: The dual sugars caramelize to a rich, buttery sweetness that’s complemented by the subtle brininess of sea salt. The vanilla extract elevates the nutty undertones of the peanut butter, creating a layered taste profile that lingers on the tongue. Every bite is a symphony of sweet, salty, and nutty notes.
- Convenience: With only twelve ingredients, this recipe is a breeze to assemble. All the components are pantry staples, so you can whip up a batch in no time. It’s perfect for a last-minute craving or a spontaneous dessert party.
- Health Angle: Oat flour brings fiber and complex carbs, while peanut butter adds protein and healthy fats. The use of unsalted butter and controlled sugar amounts keeps the calorie count reasonable. This cookie is a guilt-free indulgence that you can enjoy without feeling like you’ve broken your diet.
- Versatility: The recipe can be easily adapted for vegan or nut-free versions by swapping ingredients. Whether you’re cooking for a crowd or a single person, the scaling is effortless. The cookie’s robust flavor holds up even when you tweak the components.
- Make‑Ahead Potential: Once baked, these cookies keep well in an airtight container for up to a week. You can even freeze them for longer storage, and they reheat to perfection in the microwave or oven. That means you can bake a batch on a quiet Sunday and enjoy them all week.
- Social Proof: Friends who have tried this recipe say they can’t resist a second cookie, and some even say it’s the best version they’ve ever made at home. The cookie’s unique texture and flavor have made it a hit at potlucks and family gatherings.
- Presentation: The cookies have a beautiful golden-brown color with a slight sheen that makes them look like a treat from a high-end bakery. Their thick, chewy nature ensures they hold their shape, making them perfect for gifting or display.
Alright, let's break down exactly what goes into this masterpiece…
Inside the Ingredient List
The Flavor Base
The foundation of any great cookie is a balance of sweet and savory. Here, the 3/4 cup of packed light brown sugar and 1/4 cup of granulated sugar collaborate to create a caramelized sweetness that’s not overpowering. Brown sugar brings molasses notes and moisture, while granulated sugar adds crispness to the final texture. If you skip either sugar, the cookies will either be too dry or too sweet, losing that nuanced depth.
Vanilla extract is the unsung hero that lifts the overall flavor profile. A teaspoon of pure vanilla brings a warm, floral undertone that complements the nutty peanut butter. If you’re in a pinch, a splash of almond extract can give a different but equally delightful twist. Remember, vanilla is a flavor enhancer; too little and the cookies will feel flat, too much and they’ll taste like a vanilla cake.
The Texture Crew
Oat flour is the star of the show, providing a hearty, fibrous base that gives the cookie its signature chewiness. Unlike all-purpose flour, oat flour absorbs moisture differently, resulting in a denser crumb that still feels soft. If you’re allergic to oats, consider a blend of almond flour and coconut flour to mimic the texture.
The 1/2 cup of unsalted butter is crucial for richness. Butter’s fat content creates a tender crumb and adds a buttery aroma that’s hard to replicate with oils. Use room-temperature butter so it blends smoothly with the sugar and peanut butter. If you prefer a dairy-free version, a vegan butter substitute works well, but the flavor may be slightly different.
The Unexpected Star
Peanut butter is not just a sweet spread; it’s a protein powerhouse that lends body to the cookie. A cup of creamy peanut butter adds a luscious, almost silky center that contrasts beautifully with the oat flour’s chew. If you’re a fan of chocolate, swapping in a dark chocolate peanut butter can introduce a bittersweet note. For a vegan option, ensure the peanut butter is free of added oils or sugars.
Baking soda is the leavening agent that helps the cookies rise just enough for a light bite. A teaspoon of baking soda ensures the cookie doesn’t become too flat. If you forget this step, the cookies may be dense and heavy. Conversely, too much baking soda can give a bitter aftertaste, so stick to the recommended amount.
The Final Flourish
Fine sea salt and coarse flaky sea salt are the dynamic duo that balances sweetness with savory depth. The fine sea salt is folded into the dough, ensuring even distribution of flavor. The coarse flaky sea salt is sprinkled on top before baking, creating a delightful crunch that contrasts with the chewy interior. If you don’t have sea salt, regular table salt can work, but it won’t provide the same nuanced flavor.
Eggs act as a binder, holding the ingredients together and giving structure to the cookie. The egg yolk adds richness and a subtle golden hue, while the whole egg adds moisture and helps with the cookie’s rise. If you’re avoiding eggs, a tablespoon of unsweetened applesauce or a flaxseed egg can substitute, though the texture may change slightly.
Everything’s prepped? Good. Let's get into the real action…
The Method — Step by Step
- Preheat your oven to 350°F (175°C) and line a baking sheet with parchment paper. While the oven warms, gather all your ingredients; a well-organized workspace saves time and reduces stress. This is the moment of truth: the anticipation builds as the oven’s heat begins to mingle with the aroma of butter and peanut butter.
- In a medium bowl, whisk together the oat flour, baking soda, fine sea salt, and coarse flaky sea salt. This dry mix ensures even distribution of leavening and salt. Think of it as the base layer of a cake; if you skip this step, the cookies will lack structure.
- In a separate large bowl, cream the unsalted butter, light brown sugar, and granulated sugar with an electric mixer on medium speed until light and fluffy. The goal is a pale, airy mixture that will trap air pockets for a light bite. As the butter melts, the sugars dissolve, creating a silky texture.
- Add the peanut butter, vanilla extract, whole egg, and egg yolk to the creamed mixture. Beat until everything is fully incorporated; the batter should be smooth and glossy. At this point, the peanut butter starts to dominate the flavor profile, giving the cookie its signature richness.
- Gradually fold the dry ingredients into the wet mixture, mixing just until combined. Overmixing can cause the cookies to become tough; under-mixing can leave lumps. The dough should be thick, sticky, and slightly crumbly.
- Let the dough rest for five minutes at room temperature. This short rest allows the gluten to relax and the sugars to hydrate fully, which improves the cookie’s texture. While you wait, you can preheat a second baking sheet or prepare a cooling rack.
- Using a tablespoon or a small cookie scoop, drop rounded balls of dough onto the prepared baking sheet, spacing them about 2 inches apart. The dough will spread slightly, so don’t crowd the sheet. This step ensures even baking and prevents the cookies from merging into each other.
- Bake for 12–14 minutes, or until the edges are golden but the centers remain soft. The cookies should still feel slightly pliable when you lift them off the sheet. This is the trickiest step: if you bake too long, they’ll become brittle; too short, and they’ll be doughy.
- Remove from the oven and let the cookies cool on the sheet for 5 minutes before transferring them to a wire rack. The cooling period allows the cookies to set and develop their final chewy texture. When you break one open, the center should be moist and slightly gooey.
That's it — you did it. But hold on, I've got a few more tricks that'll take this to another level…
Insider Tricks for Flawless Results
The Temperature Rule Nobody Follows
Most bakers bake at the highest temperature they can, but this recipe thrives at a moderate 350°F. The lower temperature allows the sugars to caramelize slowly, enhancing flavor without burning the edges. I’ve found that keeping the oven at a steady temperature is key; an oven thermometer can help you maintain consistency.
Why Your Nose Knows Best
Before you pull the cookies out of the oven, trust your nose. A sweet, nutty aroma indicates that the sugars are caramelizing just right. If you notice a sharp, metallic scent, it may be a sign that the baking soda is too strong, causing a chemical reaction. Adjusting the leavening can save a batch from being overly bitter.
The 5-Minute Rest That Changes Everything
Letting the dough rest for five minutes is not just a formality; it allows the flour to hydrate fully. The rest also gives the butter time to soften, which improves the spread and results in a chewier cookie. If you skip this step, you’ll notice a slightly dry bite.
Use a Cooling Rack, Not a Plate
After baking, place the cookies on a wire rack to cool. The airflow beneath the cookies prevents steam from building up, which can make them soggy. If you’re short on a rack, use a parchment-lined sheet, but move the cookies to a cooler surface as soon as possible.
Reheat for Freshness
If the cookies have cooled and lost a bit of their chewiness, a quick reheat can restore their texture. Place them in a preheated oven at 300°F for 5 minutes, or microwave them for 10–15 seconds. Adding a splash of water before reheating creates steam that rehydrates the dough.
Creative Twists and Variations
This recipe is a playground. Here are some of my favorite ways to switch things up:
Chocolate Chip Overload
Fold in 1 cup of dark chocolate chips just before baking. The chocolate adds a bittersweet layer that complements the peanut butter. This version is perfect for chocolate lovers and can be served with a splash of espresso.
Almond Butter Twist
Replace the peanut butter with almond butter for a different nutty profile. The almond butter’s slightly sweeter flavor pairs well with the brown sugar. This variation is ideal for those who want a lighter, less intense cookie.
Spiced Cinnamon Surprise
Add 1 tsp of ground cinnamon and a pinch of nutmeg to the dry ingredients. The spices bring warmth and depth, making the cookies feel like a holiday treat. Pair them with a glass of warm milk for a cozy experience.
Seaweed Salt Finish
Sprinkle a pinch of dried seaweed flakes on top before baking. The seaweed adds umami and a subtle brininess that contrasts beautifully with the sweetness. This twist gives the cookies a gourmet edge.
Vegan Version
Use a plant-based butter, a flaxseed or chia egg substitute, and a dairy-free peanut butter. The texture remains chewy, and the flavor profile stays intact. This version is perfect for guests with dietary restrictions.
Nut-Free Delight
Swap the peanut butter for a sunflower seed butter and add chopped dried apricots for natural sweetness. The seeds provide a similar creamy texture, while the apricots add a chewy burst of fruitiness. This version is great for nut-allergic families.
Storing and Bringing It Back to Life
Fridge Storage
Place the cooled cookies in an airtight container at room temperature for up to 3 days. The airtight seal prevents moisture from seeping in, preserving the chewy texture. If you notice the cookies drying out, add a slice of apple to the container; the apple releases natural moisture.
Freezer Friendly
Wrap each cookie individually in plastic wrap and stack them in a freezer-safe bag. They stay fresh for up to 2 months. When you’re ready to enjoy, simply let them thaw at room temperature for 15 minutes before serving.
Best Reheating Method
Place the cookies on a parchment-lined tray and bake in a preheated oven at 300°F for 5 minutes. Alternatively, microwave on a low setting for 10–15 seconds. Adding a tiny splash of water before reheating steams the cookies back to perfection.